
 This online help page is dedicated to the SurgeONE.ai Master Portal and its associated functionalities for the Partner Contacts.
1. Logging in as SurgeONE.ai Partner Contact
- Let us assume that your designated role is Partner (as a Partner Contact) and you have navigated to the SurgeONE.ai Login page.
- Enter your registered email address in the Email ID field.
- Enter your password in the Password field.
- Click on the Login button below it. You will be redirected to the Companies tab of the Companies tab. The left side menu panel Entities option can be seen as selected.
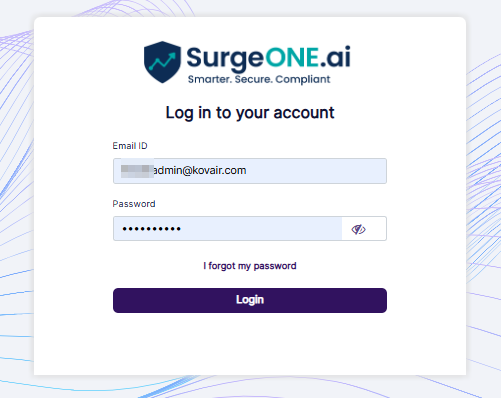 Fig: 1 - Logging in as Partner Contact person

Fig: 2 - Companies tab
The tab content can be blank if the admin has not associated any company with this Partner.
 NOTE: The following pre-requisites exist to login as Partner Contact in the SurgeONE.ai master portal:
- The partner contact account must be created in SurgeONE.ai from the Create Partner modal window.
- Partner needs to click on the Setup Your Account button or the SurgeONE.ai account link will be here link within the triggered email body to proceed to set own password.
- Contact must set password (satisfying the password strength conditions) in both the fields of the redirected Set Password page and click on the Continue button.
- The partner gets redirected to the Companies tab view of the SurgeONE.ai master portal after valid password is set.
 Fig: 3 - Partner Creation
An email gets triggered to the contact person email address as specified during Partner creation by master portal admin user.
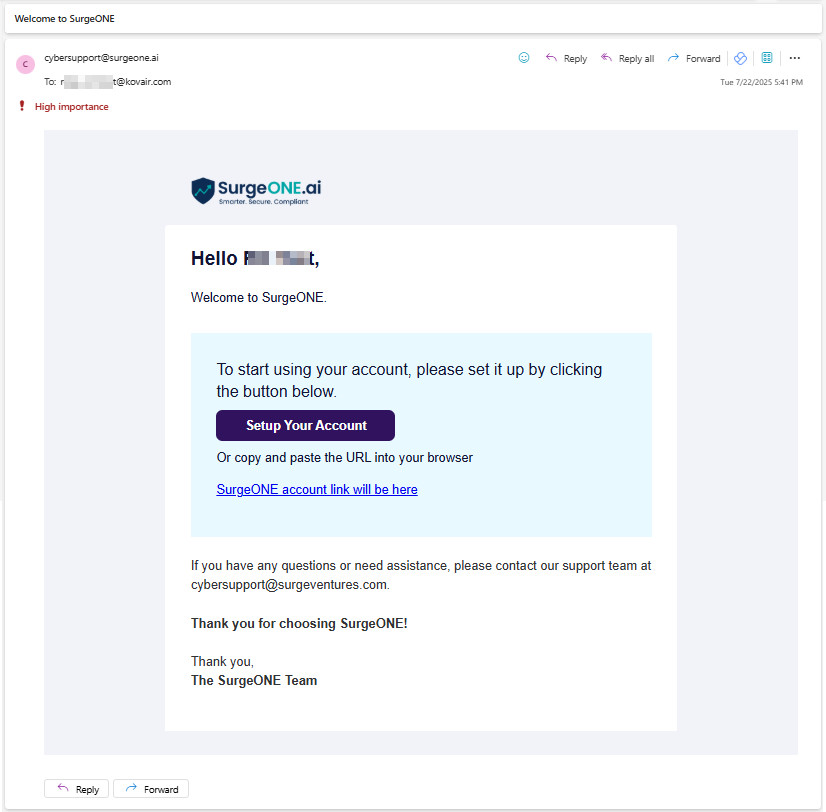 Fig: 4 - View of the triggered invitation email
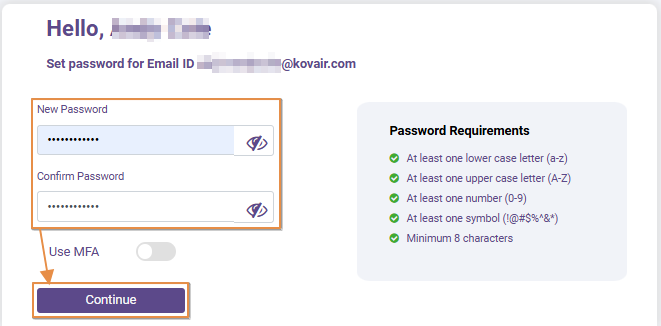 Fig: 5 - Setting own Partner account password
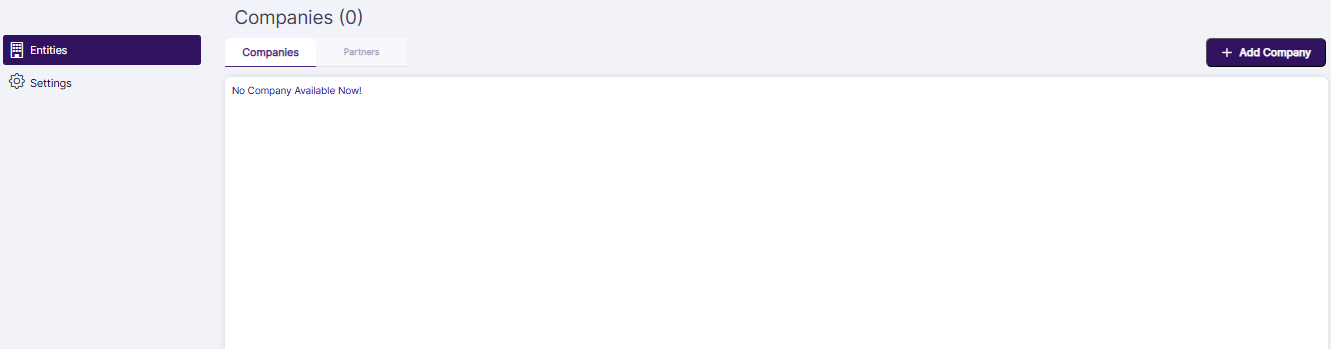 Fig: 6 - Logged in as Partner
2. Understanding the Various Elements of the Companies tab
Refer to the following screenshot which is marked with numerical values that correspond to the below stated points.

Fig: 7 - Understanding the various elements of the Companies tab
- Companies tab
- + Add Company button to create a new company
- Grid view populates the existing companies
- Eye icon to masquerade contact person SurgeONE.ai account
- ACTIONS column contains the toggled row-context menu options
NOTE: The following sub-sections elaborate further to the above-stated points.
2.1. Accessing the Companies tab
Click on the Companies tab label when the left panel Entities menu is selected to access the tab contents.
Fig: 8 - Companies tab view
Click on the Entities menu before it if the Settings menu is selected on the left panel.
2.2. Creating a New Company
- Click on the + Add Company button at the top right of the Companies tab.
- The following Create Company dialog box loads.
- Enter the applicable name of the new company (that is to be created) in the Company Name field.
- Enter the first name of the primary admin(who is to be set) for this new company in the Primary Admin: First Name field.
- Enter the middle name of the primary admin (who is to be set) for this new company in the Middle Name field.
- Enter the last name of the primary admin (who is to be set) for this new company in the Last Name field.
- Enter the valid and applicable email address of this primary admin in the Primary Admin Email field.
- The Enable Vendor AI slider is enabled by default. You can choose to disable the Enable Vendor AI slider.
- Click on the enabled Send Activation Link button to create the new Company.
-
The system will display a success notification at the top. The created company gets listed in the grid view.
 Fig: 12 - Created company visible in grid
- The Send Activation Link button is disabled by default. Only after you enter the requisite details in the mandatory fields, this button gets activated.
- Validation is employed on the Company Name field to check whether the entered name is matching with any existing company of SurgeONE.ai. If it matches and you click on the Send Activation Link button, the system prompts a tooltip below the field.
- Validation is employed on the Primary Admin Email field to check whether the entered email address is matching with email address of any existing Primary Admin account. If it matches and you click on the Send Activation Link button, the system prompts a tooltip below the field.
- The Enable Vendor AI slider functionality streamlines the vendor assessment process, ensuring accuracy and efficiency while reducing manual effort. When this slider is enabled, AI extracts relevant data from Vendor Due Diligence related documents (i.e., SOC2) provided by the vendor. After extraction, AI automatically fills out the Vendor Due Diligence questionnaire with the information captured from these documents. For more detailed understanding, refer to this.
- This Primary Admin set for the created company is the default Company / Branch Admin role of that company. An invitation email is triggered by the system to the entered email address to set your own account password.
 Fig: 9 - + Add Company button
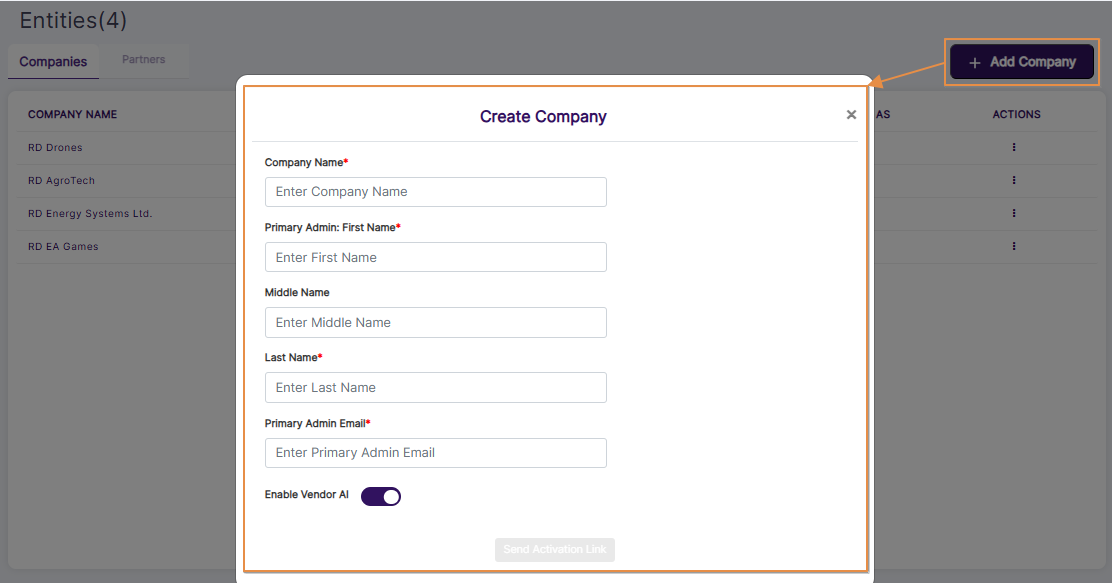 Fig: 10 - Create Company dialog box
There are user input fields labeled as Company Name, Primary Admin: First Name, Middle Name, Last Name and Primary Admin Email along with an Enable Vendor AI slider.
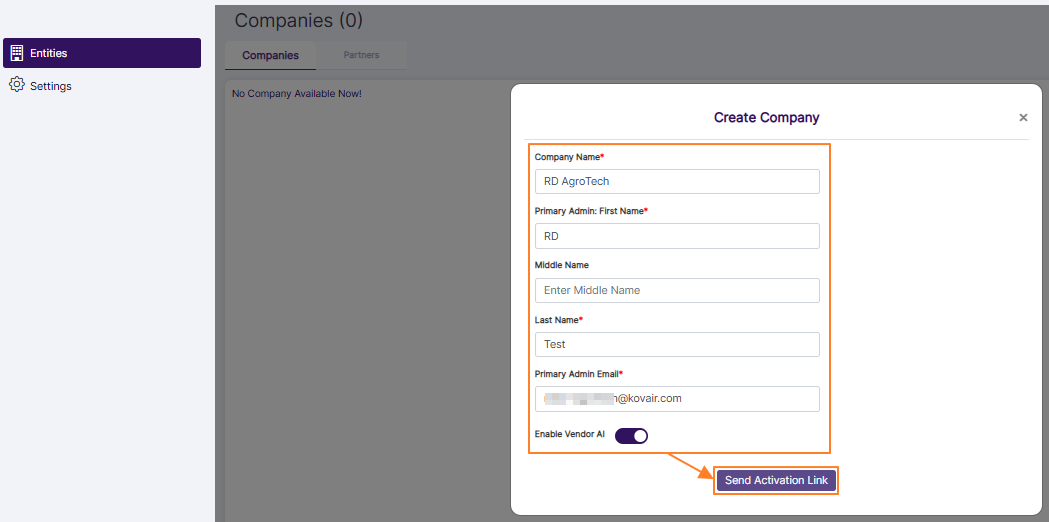 Fig: 11 - Send Activation Link button
NOTE:
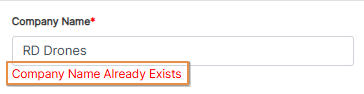 Fig: 13 - Company Name field validation
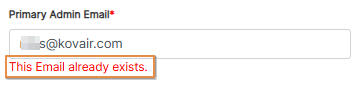 Fig: 14 - Email Field validation
Fig: 15 - Invitation email triggered by the system
2.3. Understanding the Companies Grid View
All the existing companies associated with the Partner are listed out in the Companies grid view.
 Fig: 16 - Companies grid view
The following columns populate the grid view:
- COMPANY NAME - Shows the name of the existing company which is associated with the Partner
- PRIMARY ADMIN - Shows the name of the primary Partner Contact of the company which is associated with the Partner
- PRIMARY ADMIN EMAIL - Displays the specified email address of the primary Partner Contact of the company which is associated with the Partner. It can be displayed partly or truncated, if the email address in longer than the rendered column area.
- LOGIN AS - Displays the eye icon to masquerade into the primary Partner Contact account of the company / firm
- ACTIONS - Contains the row context menu options (Invite, Associate Partner, Enable AI and Disable AI)
NOTE:
- Companies which exist in SurgeONE.ai admin portal, but are not associated with the Partner, will not be displayed in the Companies tab grid view.
- The associated functionalities of the ACTIONS column menu options are explained in the following sub-sections.
2.4. Inviting an Existing User
NOTE: There should be at least one company already created and listed out on the Companies List page. The company should have a user created for it. This initial user of the created company is designated as the default Company / Branch Admin (role) of that company and can be invited via an invitation email.
-
Click on the vertical ellipsis
 icon present under the ACTIONS column against an existing company that is listed on the Companies List.
- Click on the expanded context menu option labeled as Invite.
-
The system will display a success notification at the top.
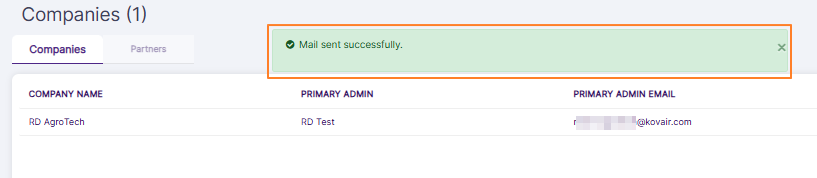 Fig: 18 - Invitation email sent success notification
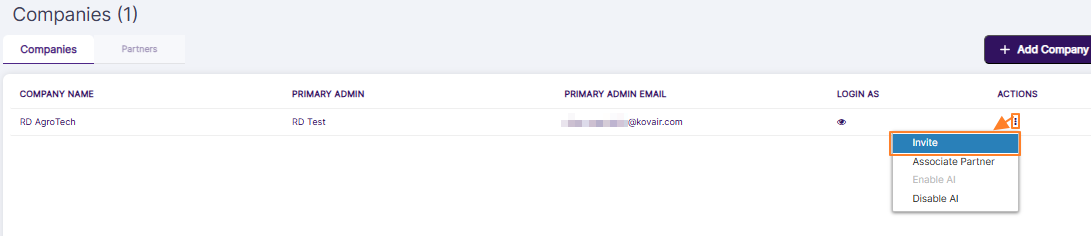 Fig: 17 - Invite context menu
NOTE:
- An invitation email is triggered by the system to the entered email address to set own custom password.
- The invite email can be sent multiple times if the invited user is yet to onboard the firm details into SurgeONE.ai (or the Partner Contact has not onboarded via the masquerade functionality).
- The Invite row-context menu option is greyed-out after the invited user has completed the firm / company onboarding process.
Fig: 19 - Invitation email triggered by the system
 Fig: 20 - Invite context menu disabled
2.5. Associating Partners
- In SurgeONE.ai master portal, you can click on the vertical ellipsis icon within the ACTIONS column against a row-specific grid view entry of the Companies tab to load the context menu options. Click on the expanded Associate Partner option.
- The following Associate Partner modal window loads. The Partners with which the Partner Contact is registered get listed here. Make appropriate checkbox selections against the listed Partners. Click on the Save button once done. If there is only one Partner, it is selected by default.
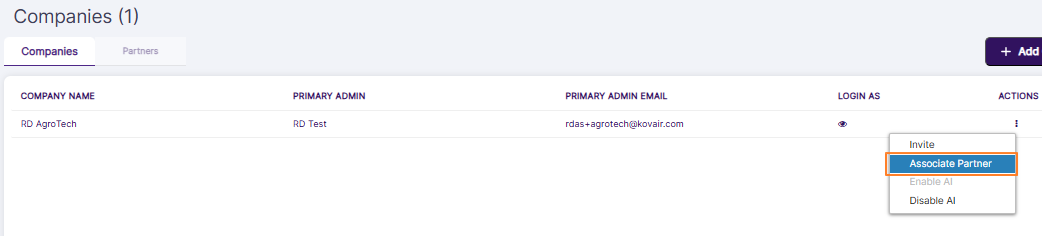 Fig: 21 - Associate Partner menu option
 Fig: 22 - Associate Partner modal view
2.6. Enabling Vendor AI
- In SurgeONE.ai master portal, you can click on the vertical ellipsis icon within the ACTIONS column against a row-specific grid view entry of the Companies tab to load the context menu options. Click on the expanded Enable AI option when the vendor AI is not enabled for the company. If the vendor AI is enabled already for the company. then the menu option is displayed but is greyed-out.
- The following Enable AI modal window loads with the Vendor AI slider in disabled state. Click on the Save button once slider selection is done.
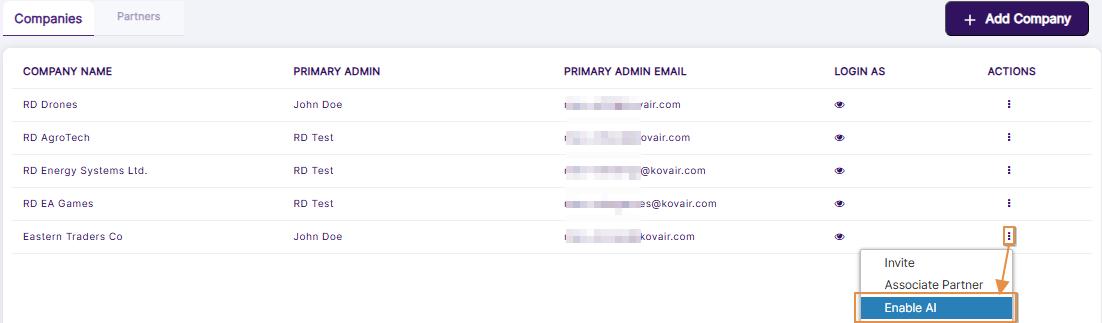 Fig: 23 - Enable AI menu option
 Fig: 24 - Saving slider selection change in the Enable AI modal window
NOTE:
- The Enable Vendor AI slider functionality streamlines the vendor assessment process, ensuring accuracy and efficiency while reducing manual effort. When this slider is enabled, AI extracts relevant data from Vendor Due Diligence related documents (i.e., SOC2) provided by the vendor. After extraction, AI automatically fills out the Vendor Due Diligence questionnaire with the information captured from these documents. For more detailed understanding, refer to this.
- When the Enable Vendor AI slider is enabled, then a vendor without any documentation or document details in the Vendor Management module cannot be assigned a new vendor assignment.
2.6.1. Disabling Vendor AI
- In SurgeONE.ai master portal, you can click on the vertical ellipsis icon within the ACTIONS column against a row-specific grid view entry of the Companies tab to load the context menu options. Click on the expanded Disabled AI option when the vendor AI is already enabled for the company. If the vendor AI is not enabled already for the company. then the menu option is displayed but is greyed-out.
- The following Disable AI modal window loads with the Vendor AI slider in enabled state.
- Click on the Save button once the slider deselection is done.
 Fig: 25 - Disable AI menu option
 Fig: 26 - Saving slider selection change in the Disable AI modal window
NOTE: When the Enable Vendor AI slider is disabled, then a vendor without any documentation or document details in the Vendor Management module can be assigned a new vendor assignment.
2.7.1. Setting up a Firm by Masquerading the Company / Branch Admin User Account
- In SurgeONE.ai master portal, you can click on the + Add Company button of the Companies tab to begin creating a new company.
- Provide the necessary details and click on the Send Activation Link button to create the new company.
- The new company gets listed in the grid view of the Companies tab. Click on the eye icon of the LOGIN AS column.
- The Partner Contact will need to specify details about your organization or firm to get started. There are three stages of setting up your organization related details in SurgeONE.ai.
- First Partner Contact must provide requisite information related to your business.
- In the next stage, Partner Contact may allocate users who can access this created organization in SurgeONE.ai. Partner Contact can skip this stage if Partner Contact want to set up users or employees later on.
- The firm name is pre-populated as per the company name. Other mandatory details must be provided before clicking on the Next button to proceed to the second stage.
- Here is the view of the Enroll Users page. By default, the account that was created by the Partner Contact is always listed out here as a row entry of the grid view. Partner Contact can proceed to add employee(s), or can skip this activity for later set up. Click on the Skip for now option to skip and proceed to the third stage. If Partner Contact creates an employee, the new employee details get listed in the grid view. The Enroll Users page displays the created users of the organization.
- Click on the Submit button to finalize the organization. The Company onboarding or setup is thus completed by the Partner Contact instead of the Company / Branch Admin.
- The Partner Contact gets navigated to the SurgeONE.ai Dashboard.
- The Partner Contact can log out of the company using the Logout option.
- An email gets triggered so that the Company / Branch Admin can sign up later to set up your own password.
- Here is the view of the redirected password setting page with the password provided and MFA slider enabled.
- The Company / Branch Admin can also enter the unique code in the MFA Verification page, as received via email.
- The Company / Branch Admin gets redirected to the Dashboard page.
Fig: 27 - Adding Company
Fig: 28 - Creating Company
 Fig: 29 - LOGIN AS eye icon
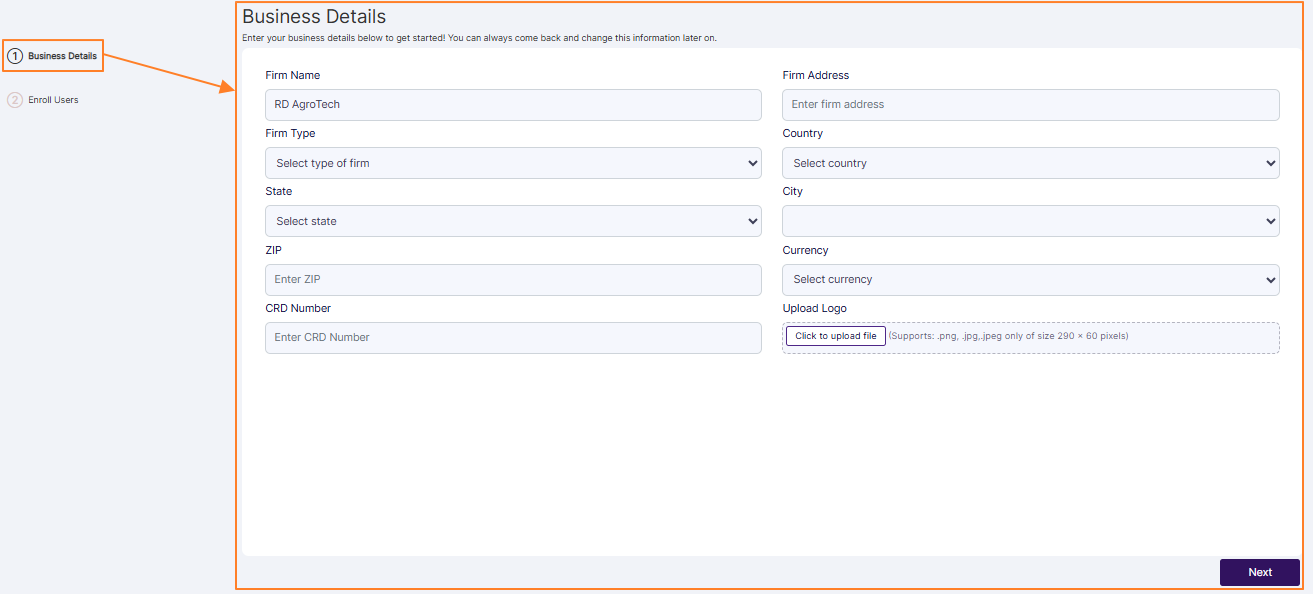 Fig: 30 - Providing business details in first stage
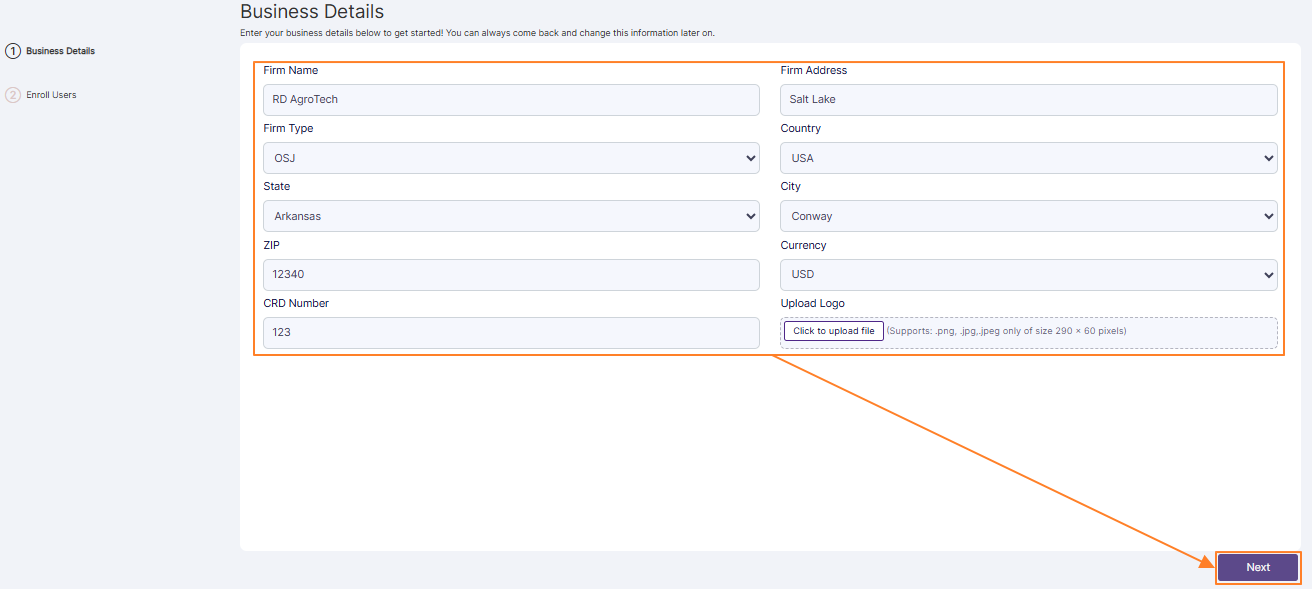 Fig: 31 - Proceeding to the second stage after providing business details
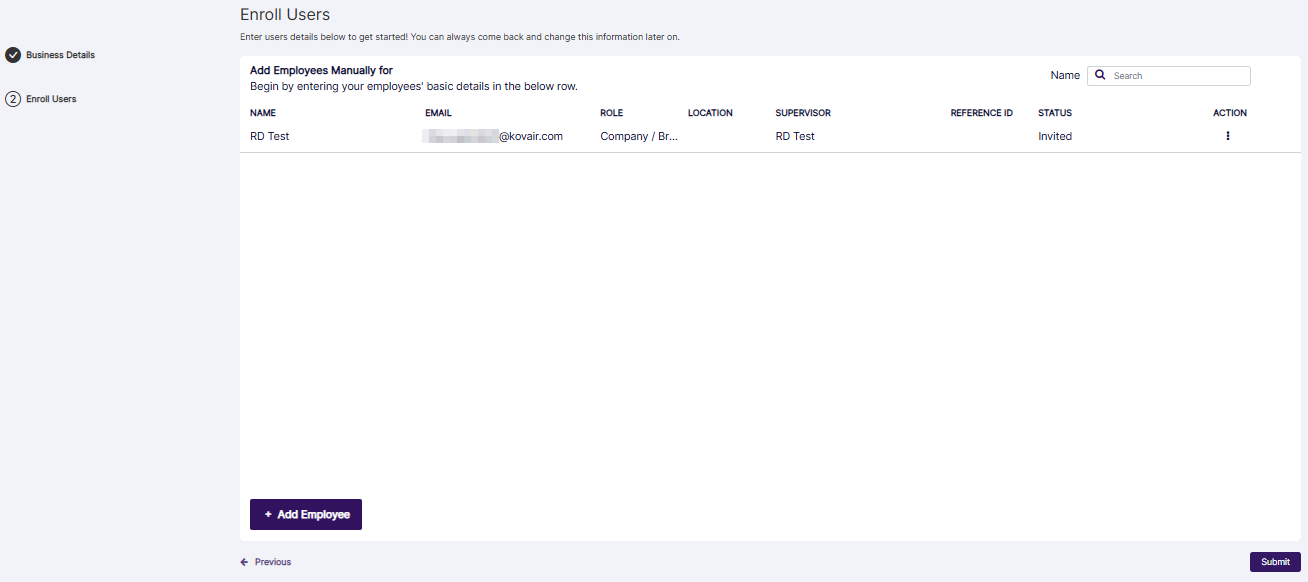 Fig: 32 - Enrolling users facility in second stage
 Fig: 33 - Submit button
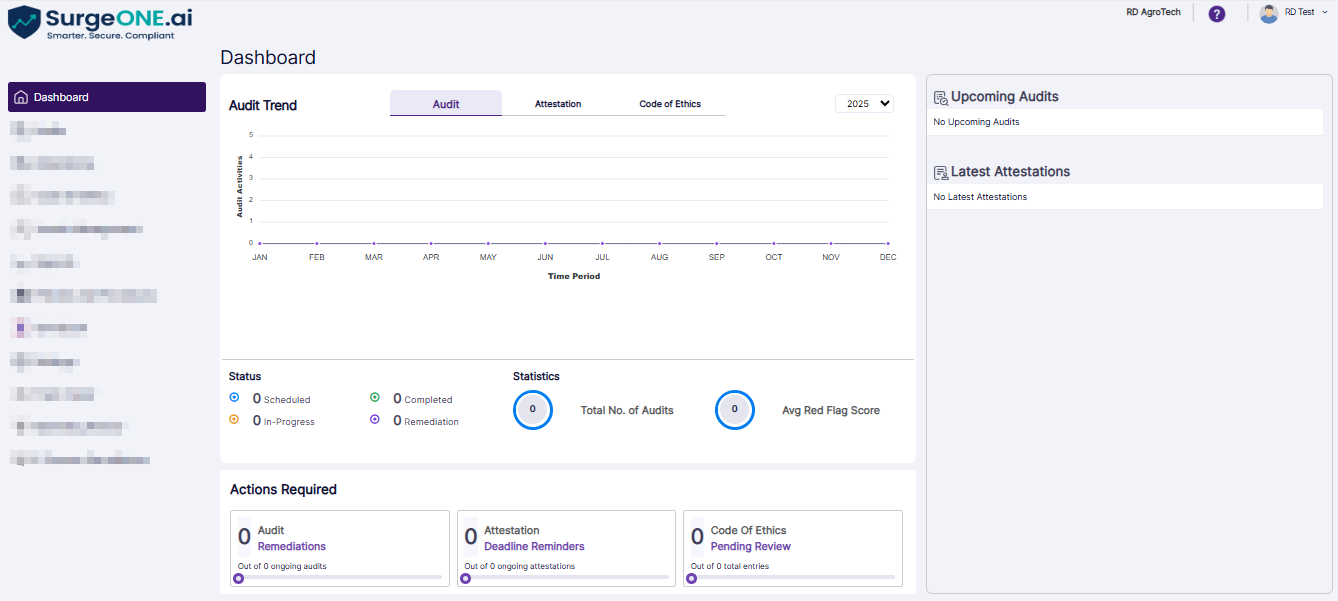 Fig: 32 - Dashboard view after redirection
 Fig: 33 - Logging out of masqueraded account
Fig: 34 - Received email to set password
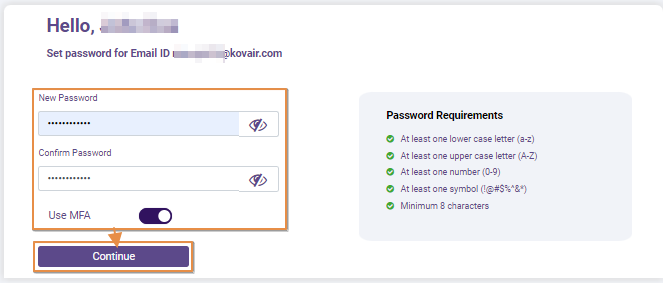 Fig: 35 - Setting login password and enabling MFA
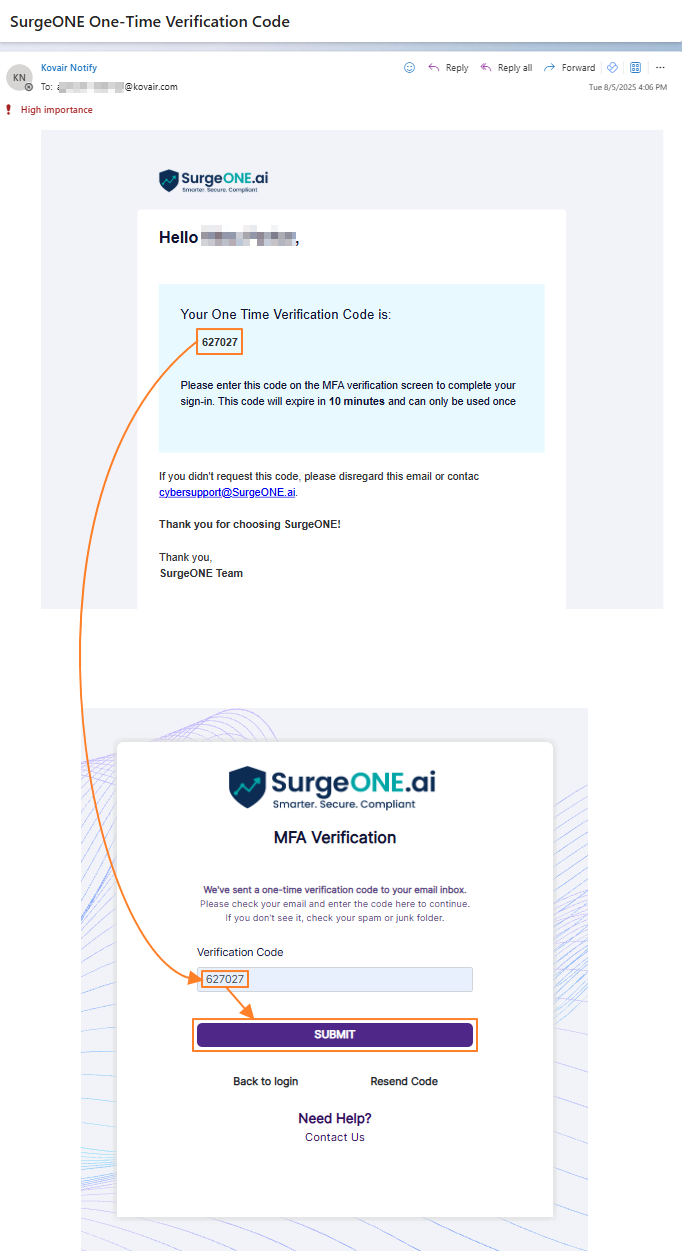 Fig: 36 - Entering MFA code from email in MFA Verification page to login securely
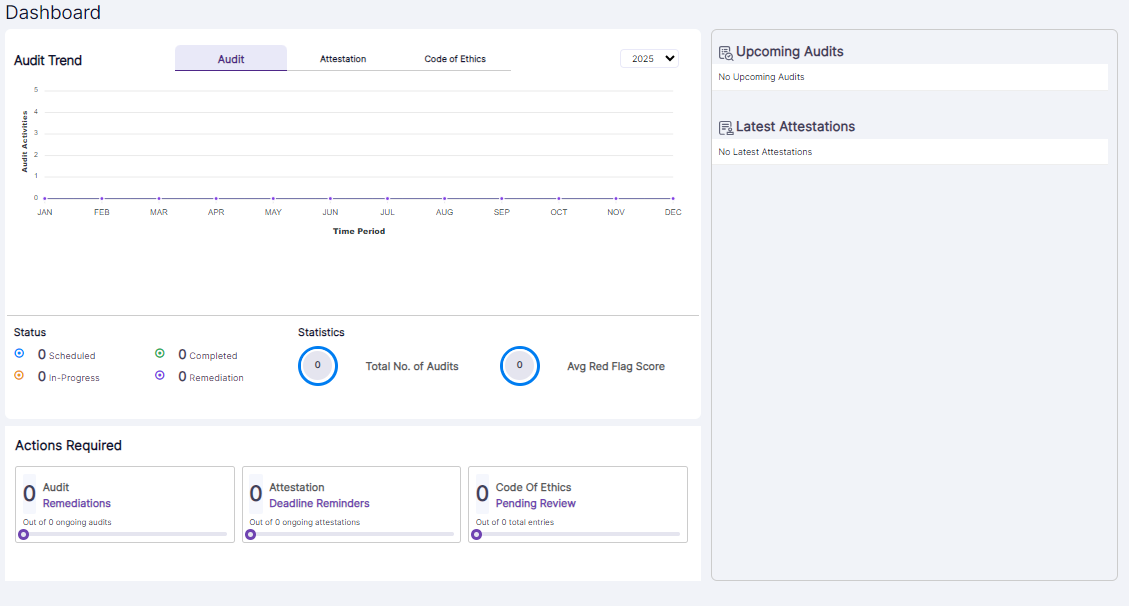 Fig: 37 - Dashboard view after Company / Branch Admin logs into SurgeONE.ai
NOTE: More details on the company setup process have been mentioned here.
2.7.2. Masquerading as the Company / Branch Admin User's Account When the Firm is Already Setup in SurgeONE.ai
- Click on the eye icon of the LOGIN AS column of the Companies tab.
- The Partner Contact gets navigated to the SurgeONE.ai Dashboard.
- The Partner Contact can log out of the company using the Logout option.
 Fig: 38 - LOGIN AS eye icon
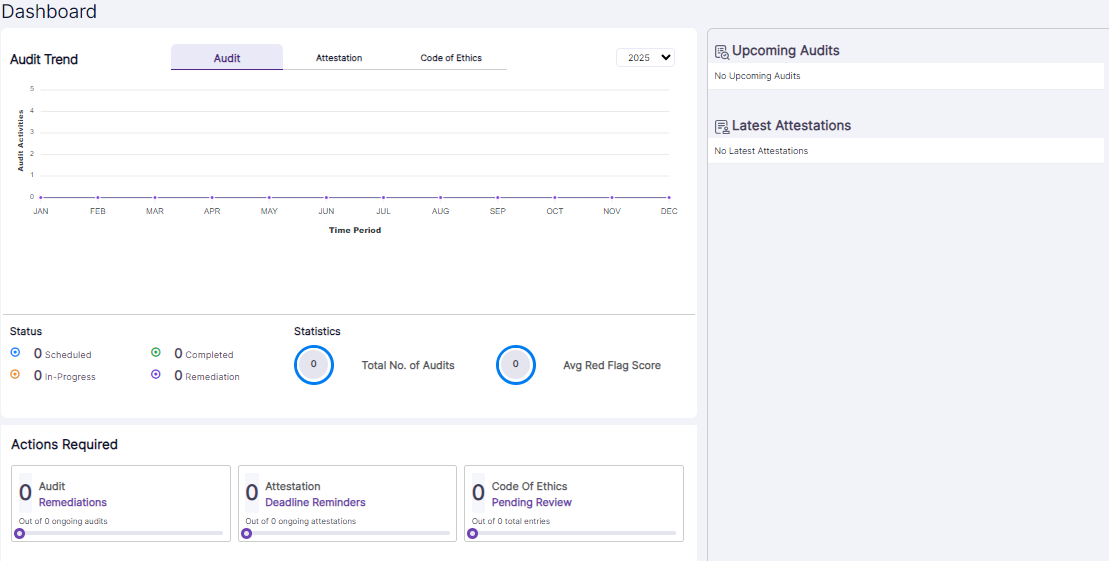 Fig: 39 - Dashboard view after redirection
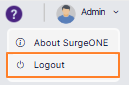 Fig: 40 - Logging out of masqueraded account
3. Understanding the Various Elements of the Partners tab
This section explains the functionality of the Partner view. When the Partner Contacts log in to the SurgeONE.ai master portal and navigate to the Partners tab view, they can find the Partners for which their accounts are registered. They can also masquerade down and view the firms / companies as if they were logged in as the Company / Branch Admin role user.
Refer to the following screenshot which is marked with numerical values that correspond to the below stated points.

Fig: 41 - Understanding the various elements of the Partners tab
- Partners tab
- Grid view populates the existing partner(s)
- Eye icon to masquerade contact person SurgeONE.ai account
- ACTIONS column contains the toggled row-context menu options
NOTE: There is no provision for the Partner Contact to create a new Partner. The following sub-sections elaborate further to the above-stated points.
3.1. Accessing the Partners tab
Click on the Partners tab label to access the tab contents.
 Fig: 42 - Partners tab
3.2. Understanding the Partners Grid View
The Partners grid view lists out all the existing partners of your organization.
 Fig: 43 - Partners grid view
The following columns populate the grid view:
- PARTNER NAME - Shows the name of the partner
- CONTACT PERSON - Shows the contact person of the partner
- CONTACT PERSON EMAIL - Displays the specified email address of the contact person of the partner. It can be displayed partly or truncated, if the email address in longer than the rendered column area.
- COMPANIES - Shows the numerical count of the total number of the associated companies linked with the partner
- RECENTLY ONBOARDED - Displays the date-time value of onboarding. Onboarding refers to the three steps required in SurgeONE.ai to set up firm details and access the SurgeONE.ai Dashboard
- LOGIN AS - Displays the eye icon to masquerade into the Fusion partner firm contact person account
- ACTIONS - Contains the row context menu options (Edit, More Info, Manage Partner Contacts and Associate Company)
NOTE: The associated functionalities of the ACTIONS column menu options are explained in this sub-section.
3.3. Masquerading any Company / Firm Associated With Partner
- Click on the eye icon within the LOGIN AS column of the Partners tab.
- The following Login As modal window loads.
- Choose appropriate associated company from the options of the Select the company you want to login as dropdown. The options populate this dropdown only when companies are already associated with this partner.
- Click on the Continue button. The SurgeONE.ai master portal Partner Contact gets navigated to the SurgeONE.ai Dashboard view of the chosen company / firm.
- The Partner Contact can logout of the company using the Logout option.
 Fig: 44 - LOGIN AS eye icon
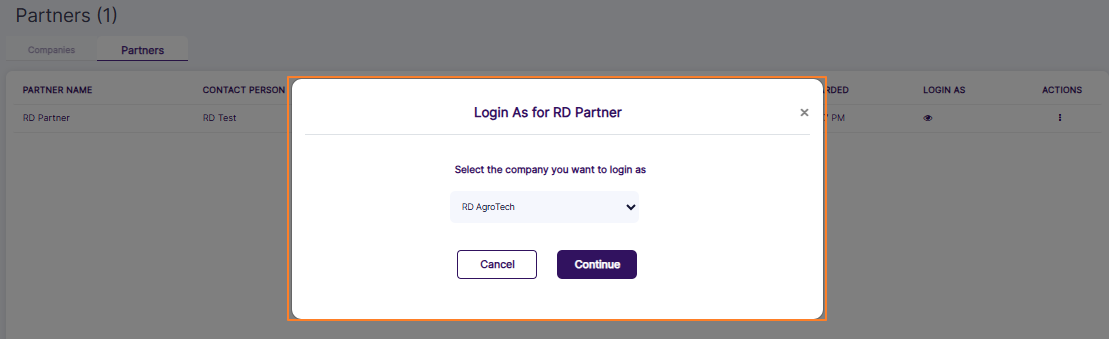 Fig: 45 - Login As modal window
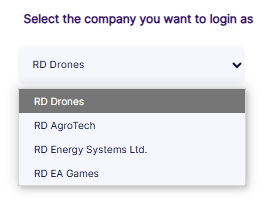 Fig: 46 - Expanded view of the associated companies of the specific partner
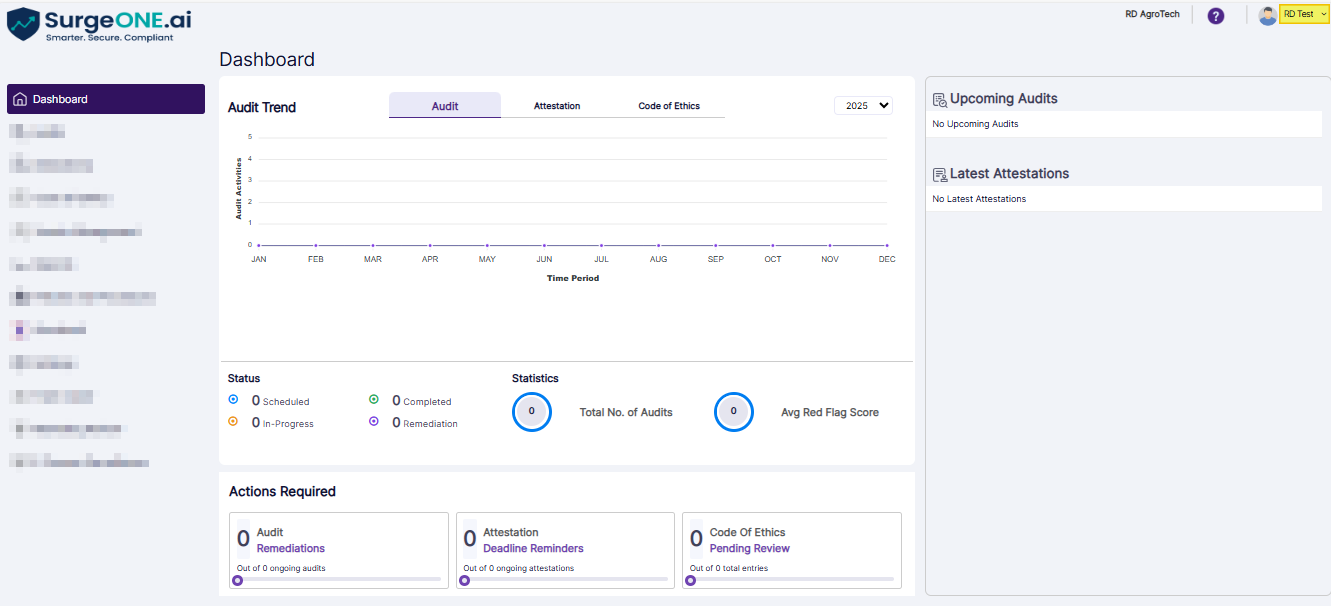 Fig: 47 - Partner Contact user masqueraded into SurgeONE.ai Dashboard view of the chosen firm
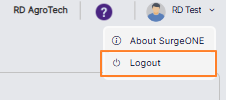 Fig: 48 - Logging out of masqueraded account
3.4. Using the ACTIONS Column Menu Options
The following sub-sections elaborate on the functionalities associated with the four row-context menu options which are accessible via the vertical ellipsis icon of the ACTION column.
3.4.1. Editing a Partner
- Click on the vertical ellipsis icon within the ACTIONS column against a row-specific grid view entry of the Partners tab to load the context menu options. Click on the expanded Edit option.
- The following Edit Partner modal window loads. Make appropriate modifications of the partner person's details and click on the Save button.
 Fig: 49 - Edit menu option
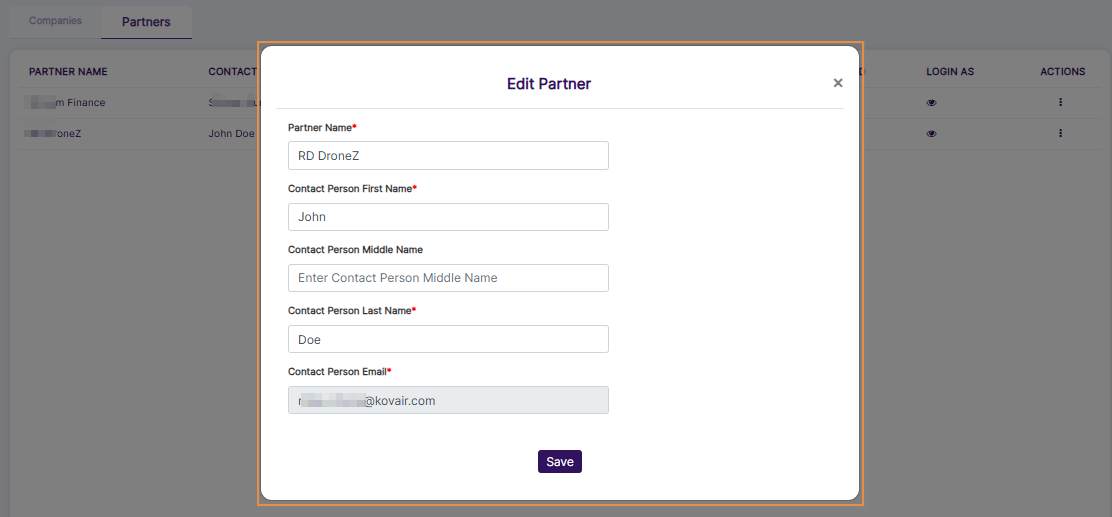 Fig: 50 - Edit Partner modal view
NOTE: You cannot edit the email address as the Contact Person Email field is greyed out.
3.4.2. Viewing Partner Information
- Click on the vertical ellipsis icon within the ACTIONS column against a row-specific grid view entry of the Partners tab to load the context menu options. Click on the expanded More Info option.
- The following Partner Info modal window loads.
- The following fields are displayed:
- Name of the partner
- Partner status
- Onboarded On datetime value
- Company Type
- Number of Contact Persons within parenthesis
- Contact Person details added such as the Primary Contact Person name and the Primary Contact Person Email ID
- Names of the Companies associated with the partner and the total number of associated companies within parenthesis
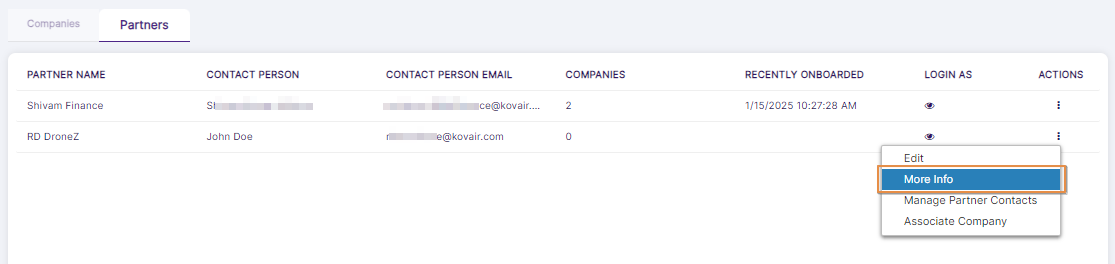 Fig: 51 - More Info menu option
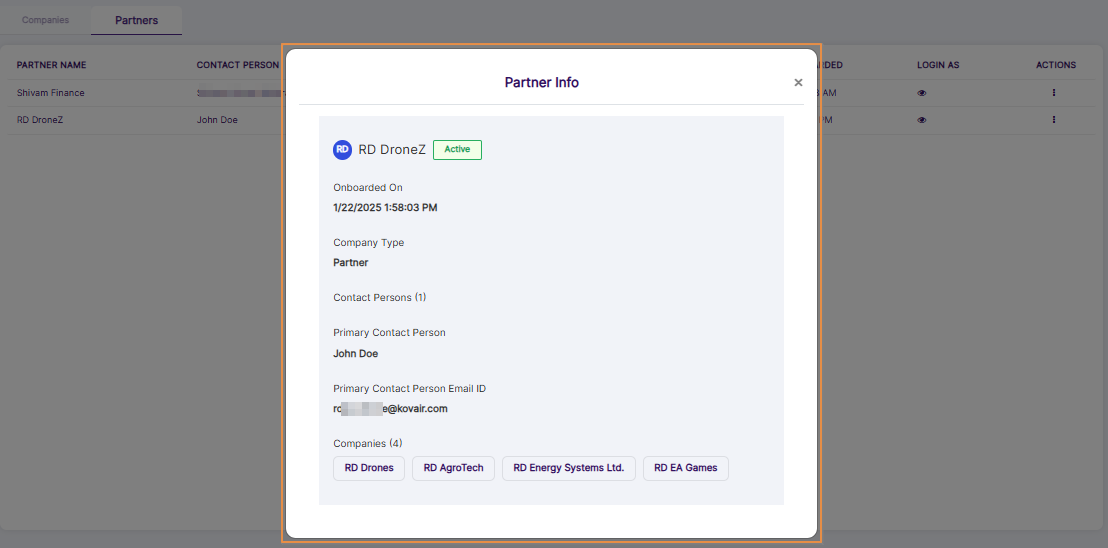 Fig: 52 - Partner Info modal view
NOTE: You cannot make any changes to the displayed field values.
3.4.3. Managing Partner Contacts
- Click on the vertical ellipsis icon within the ACTIONS column against a row-specific grid view entry of the Partners tab to load the context menu options. Click on the expanded Manage Partner Contacts option.
- The following Enroll Partner Contacts modal window loads.
- The following functionalities are supported in this page:
- Use the Add Contact button to create new Contact(s) manually
- Search for Contacts
- Use the row-context Edit menu option of the ACTION column to edit a Contact
- Use the row-context Invite menu option of the ACTION column to invite a newly created Contact
- Use the row-context Delete menu option of the ACTION column to delete a Contact
- Cannot use the row-context Assign Role(s) menu option of the ACTION column to set roles to a Contact as it is currently disabled
 Fig: 53 - Manage Partner Contacts menu option
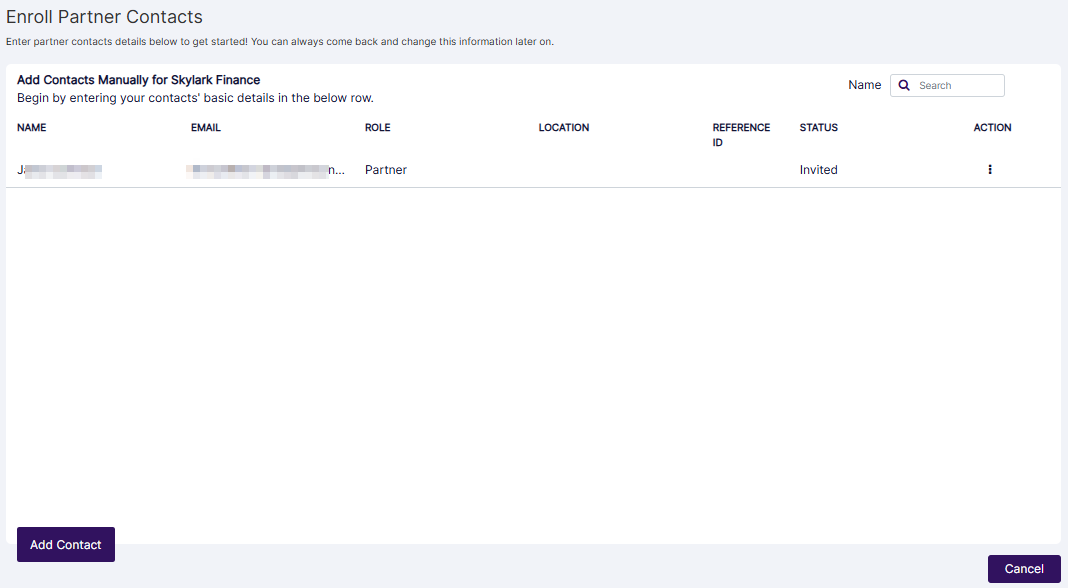 Fig: 54 - Enroll Partner Contacts modal view
NOTE: You can always come back and change this Partner Contacts information later on.
3.4.3.1. Adding a Partner Contact
- Click on the Add Contact button to begin creating a new Contact. The following Create New Partner Contact modal window loads.
- First Name: Enter the first name of the Contact.
- Middle Name: Enter the middle name of the Contact. This is an optional field.
- Last Name: Enter the last name of the Contact.
- City: Select the current city of the Contact.
- Email ID: Enter the valid email address of the Contact. The invitation email will be sent at this address.
- ZIP: Enter the valid zip code of the Contact address.
- Enter the required details and click on the Save or Save & Send Activation Link button.
- The Contact gets listed in the grid view of the Enroll Partner Contacts page.
 Fig: 55 - Create New Partner Contact modal view
The following fields are present:
 Fig: 56 - Saving Contact details
 Fig: 57 - New Contact populates the grid view
NOTE:
- The following screenshot displays the various field validations which are applicable.
- The following screenshot displays the email address field validation on duplicate value.
 Fig: 58 - Field validations employed
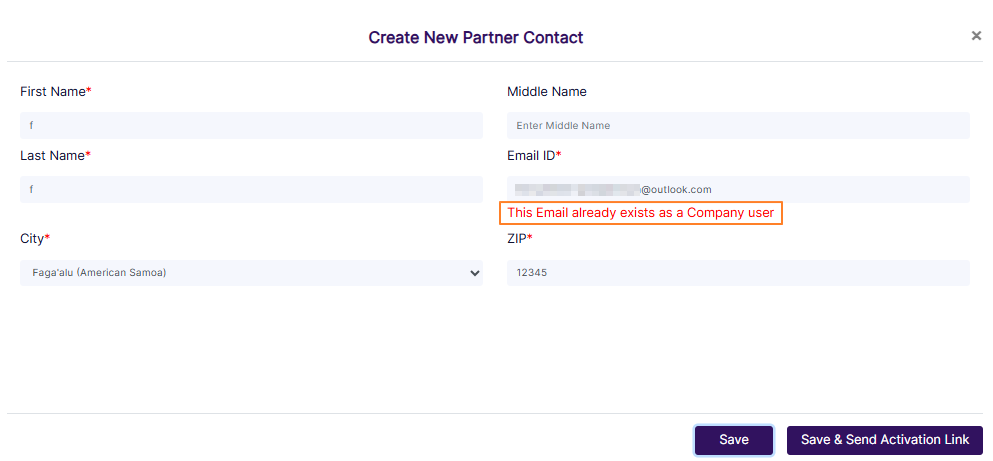 Fig: 59 - Email address validation
3.4.3.2. Searching for a Partner Contact
Enter the name of the Contact based on which you want to execute the search operation. If matching user is found, it will populate the grid view.
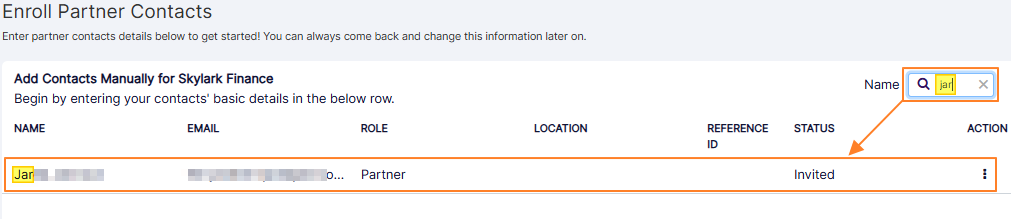 Fig: 60 - Search bar
NOTE: This user search facility operates only on the username (text displayed under the NAME column, and not on the data of any of the other columns.
3.4.3.3. Editing a Partner Contact
- Click on the vertical ellipsis icon within the ACTIONS column against a row-specific grid view entry of the Enroll Partner Contacts page to load the context menu options. Click on the expanded Edit option.
- The following Edit Partner Contact modal window loads. Make appropriate modifications of the partner contact person's details.
- Click on the Save or Save & Send Activation Link button.
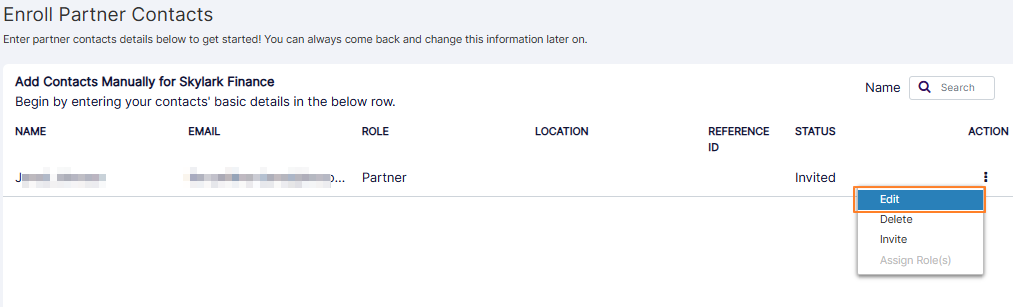 Fig: 61 - Edit menu option
 Fig: 62 - Edit Partner Contact modal view
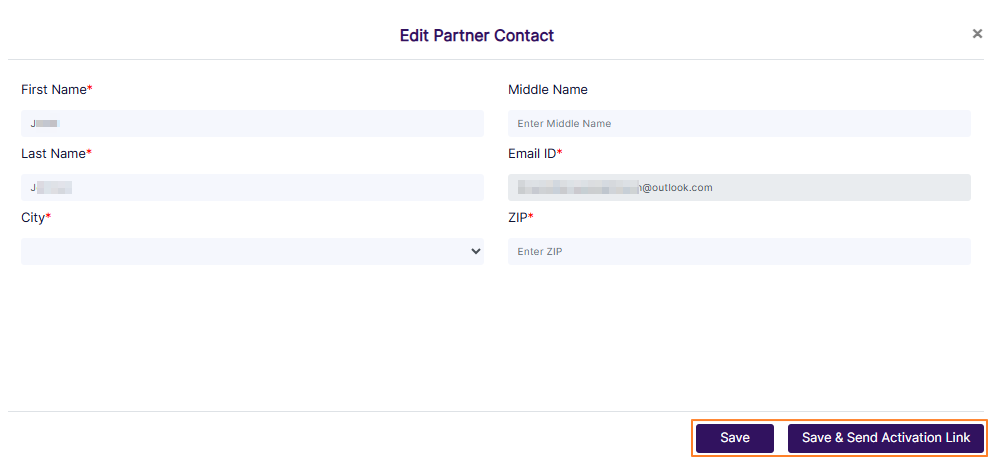 Fig: 63 - Saving changes
NOTE:
- You cannot edit the email address as the Email ID field is greyed out.
- When you click on the Save & Send Activation Link button, the invite mail gets triggered.
3.4.3.4. Inviting a Partner Contact
- Click on the vertical ellipsis icon within the ACTIONS column against a row-specific grid view entry of the Enroll Partner Contacts page to load the context menu options. Click on the expanded Invite option.
- After the invite mail gets triggered the label changes from Invite to Re-send Invite. It performs the same functionality of sending the invitation email.
 Fig: 64 - Invite menu option
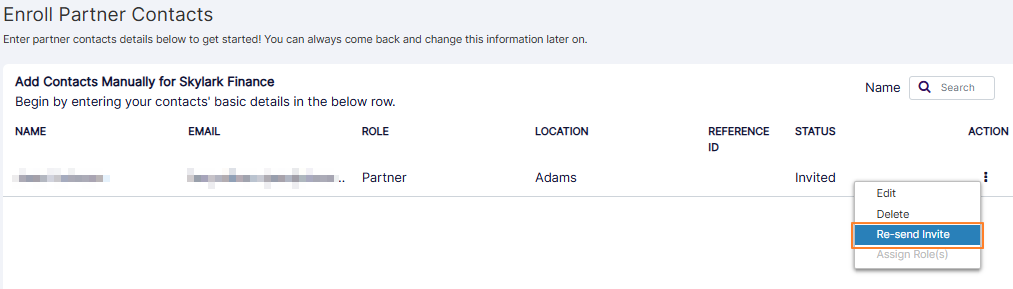 Fig: 65 - Re-send Invite menu option
3.4.3.5. Deleting a Partner Contact
Perform the following steps to delete a created Partner Contact.
- Click on the row context Delete menu after clicking on the vertical ellipsis icon displayed under the ACTION column.
- After you click on it, the system will prompt a confirmation dialog box. Click on the Yes button to proceed to remove the Partner Contact.
- The Partner Contact account gets removed from the Enroll Partner Contacts grid view.
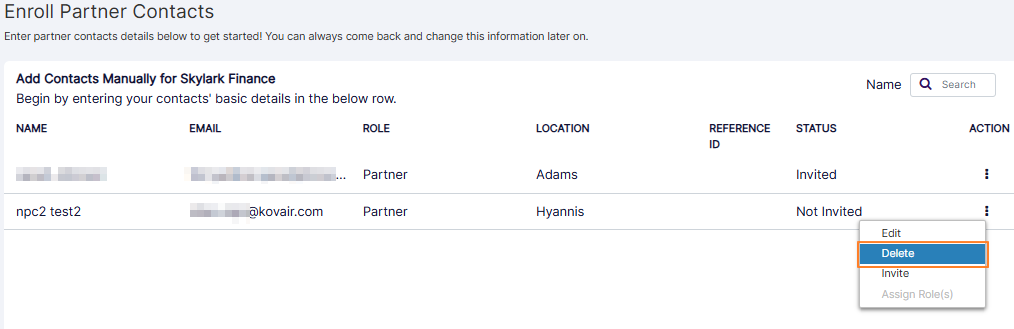 Fig: 66 - Delete menu option to remove the Partner Contact
 Fig: 67 - Delete confirmation
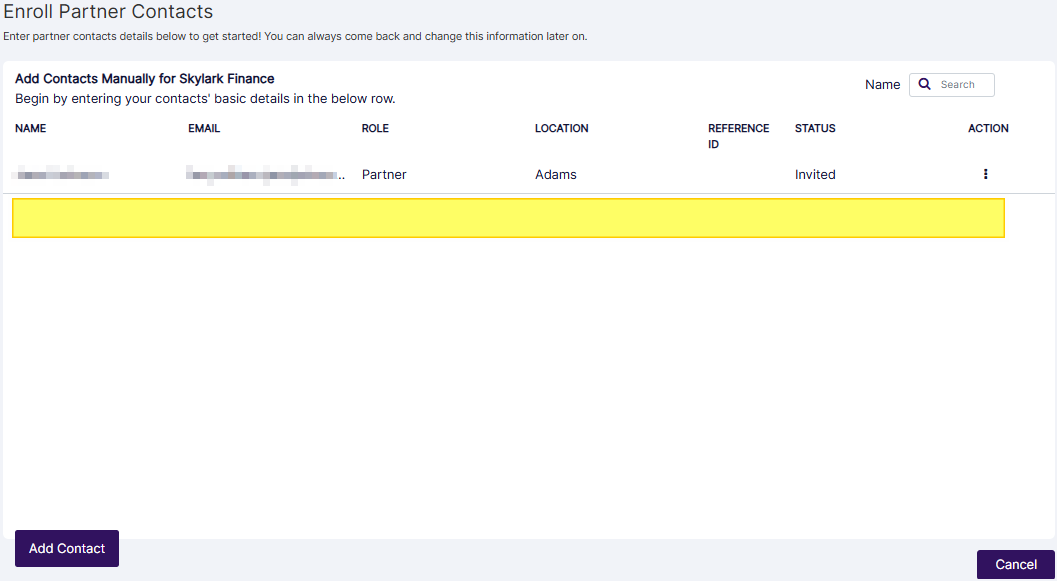 Fig: 68 - Partner Contact account removed
NOTE:
- Once the Partner Contact account is onboarded into SurgeONE.ai, the account cannot be deleted.
- Once the Partner Contact account is deleted, the account cannot be restored, and the Contact cannot login to the application.
 Fig: 69 - Cannot delete onboarded Partner Contact
3.4.3.6. Assigning Roles to a Partner Contact
- Currently, you cannot click on the row context Assign Role(s) menu after clicking on the vertical ellipsis icon displayed under the ACTION column as it is disabled.
- In SurgeONE.ai master portal, you can click on the vertical ellipsis icon within the ACTIONS column against a row-specific grid view entry of the Partners tab to load the context menu options. Click on the expanded Associate Company option.
- The following Associate Company modal window loads. Make appropriate checkbox selections against the listed Companies. The Companies which are created get listed here. Click on the Save button once done.
- Get redirected to the Partners tab view. Notice that the numeric value displayed within the COMPANIES column gets updated as per the Associate Company selections made. Also, if you navigate to the Companies tab, the listed entries of the grid view get updated accordingly. Refer to the following image.
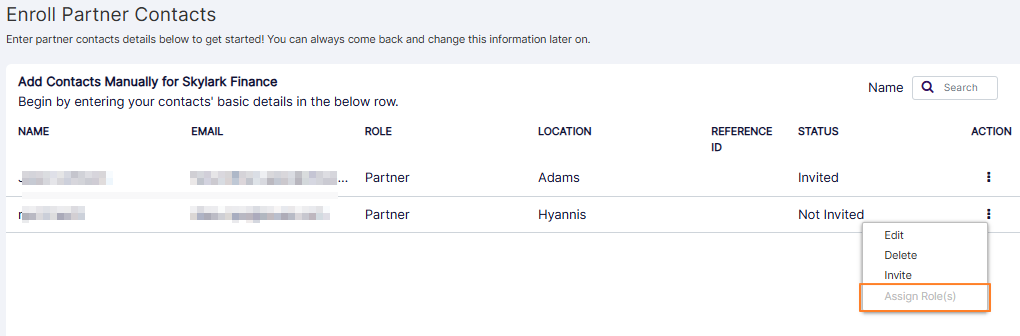 Fig: 70 - Assign Role(s) menu option
3.5. Associating Companies
 Fig: 71 - Associate Company menu option
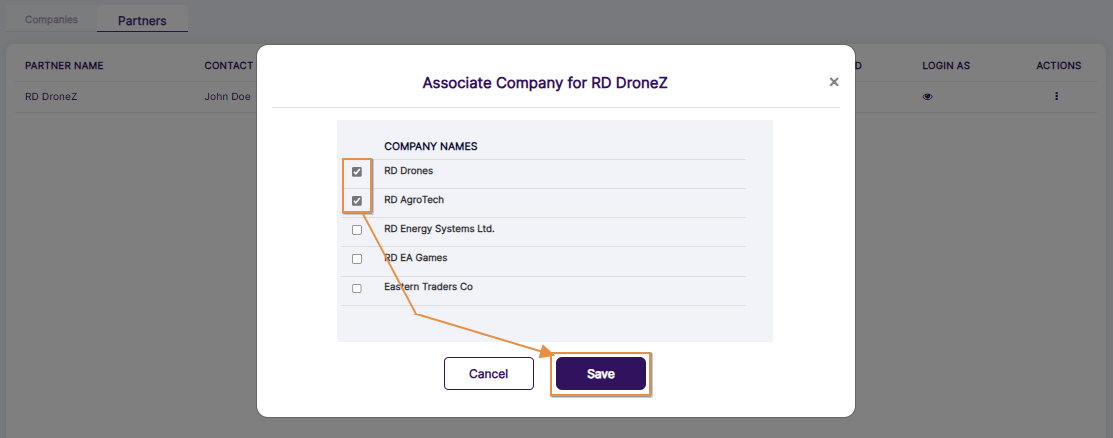 Fig: 72 - Associate Company modal view
 Fig: 73 - Associated Companies count view
NOTE: The Partner Contact can only remove any previously associated company. The Partner Contact cannot include associations with companies that have been removed (by self or any other permitted SurgeONE.ai user).
4. Use the Settings Menu
Partner Contact can use the left panel Settings menu to update the login password and enable or disable the multi factor authentication facility for secure login.
4.1. Navigating to SurgeONE.ai Master Portal Settings > Change Password
Click on the Settings menu option to get redirected to the SurgeONE.ai Change Password page. Alternatively, if you are in another page under Settings, then click on the Change Password sub-menu option under it.
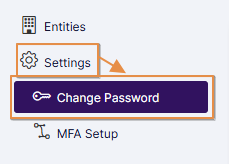 Fig: 74 - Change Password menu option
Here is the view of the loaded page.
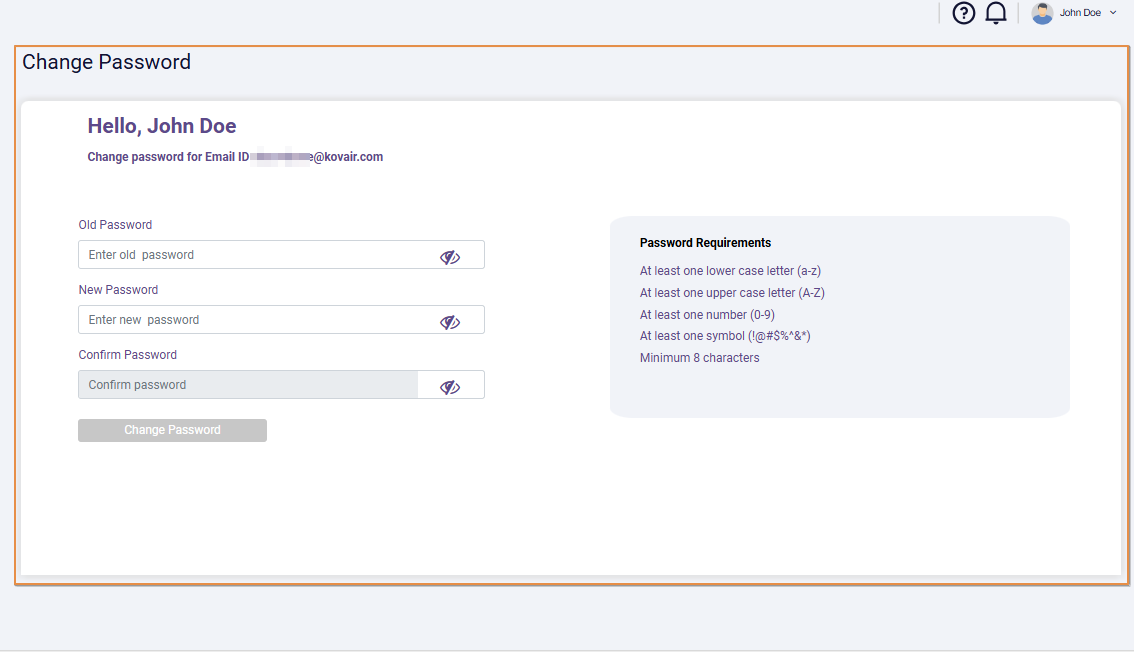
Fig: 75 - Change Password page view
4.1.1. Changing Login Password
You can update your login password here, which will be used to authenticate your user account in the SurgeONE.ai login page.
You can find that there are three fields labeled as Old Password, New Password and Confirm Password. Enter the existing password in the former, and the suitable / desired passwords which match with one another in the following two fields. There are certain conditions for the new password to be accepted by the system, as follows:
- At least one lowercase letter
- At least one uppercase letter
- At least one number
- At least one symbol. Supported symbols are ! (exclamation mark), @ (at the rate), # (hash), $ (dollar), % (percentage), ^ (exponent), & (ampersand), * (star/multiplication)
- Minimum 8 characters password length
The Change Password button gets enabled after entering desired passwords. Click on it. The desired passwords must be valid and matching to proceed.
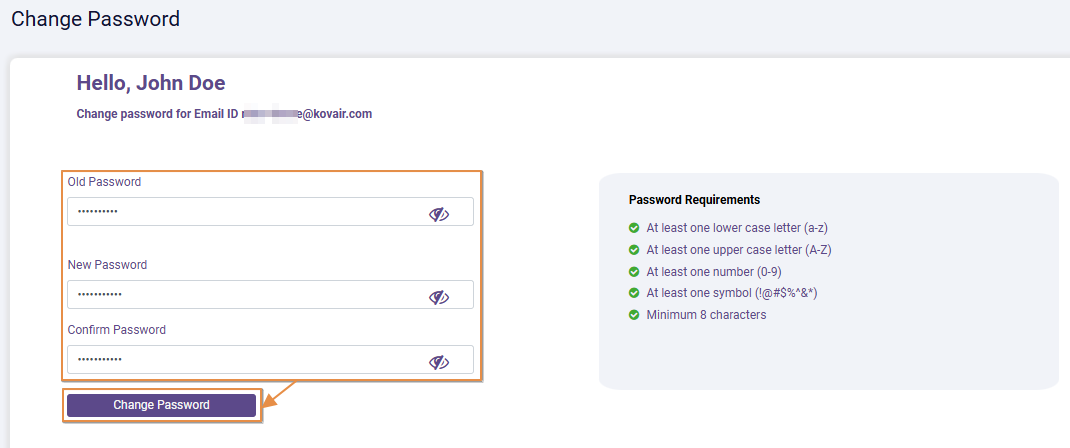 Fig: 76 - Saving new Password
After your desired password is set as the login password, a success notification gets prompted at the top to notify you about the password update.
 Fig: 77 - Success notification prompted
NOTE:
-
As you begin to enter password in the New Password field, a green tick
 icon can be seen beside the password setting related satisfied condition, at the right side of the field.
-
On the Old Password field or on New Password field or on the Confirm Password field, a slashed eye
 icon can be seen at the right side within the field. Click on the slashed eye icon to reveal the entered password by changing the display type from masked to legible text. The eye slash icon changes to the eye
  icon. Click again on the eye icon to mask the entered password. The icon changes back to .
- The Change Password button is disabled on page load. It is enabled only after you enter valid and matching passwords in the Old Password, New Password and Confirm Password fields, provided that all the stipulated conditions to set a new password are met.
- A tooltip gets prompted if the old (existing) password is incorrectly entered.
- A tooltip gets prompted if the old (existing) password and the new (desired) password specified are the same. You must modify the desired one to proceed to update your login password.
- After setting your password successfully, you get redirected to the SurgeONE.ai login page. You need to enter this updated password in the Password field instead of the previous one.
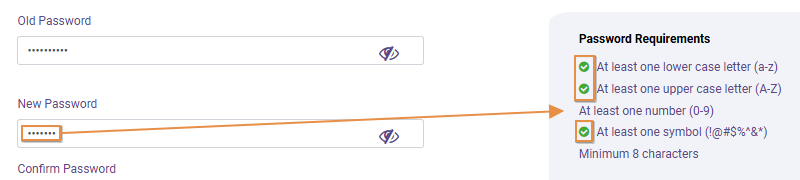 Fig: 78 - Satisfied condition met for setting password
 Fig: 79 - Password unmasking/masking
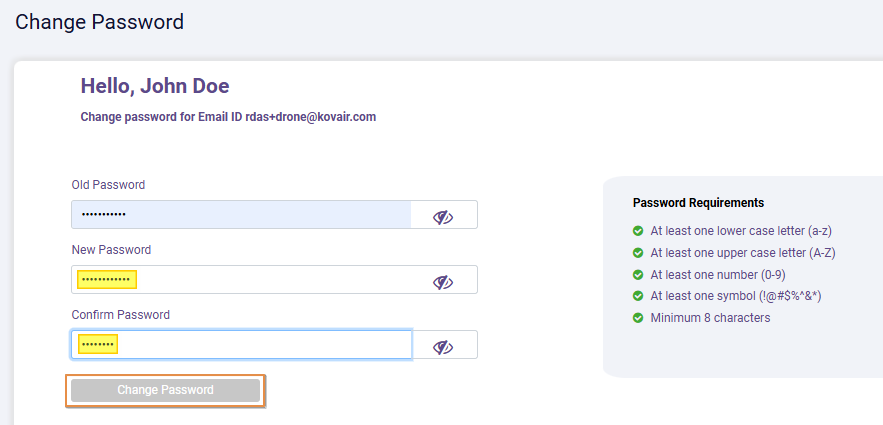 Fig: 80 - Change Password button disabled when all the conditions are not met
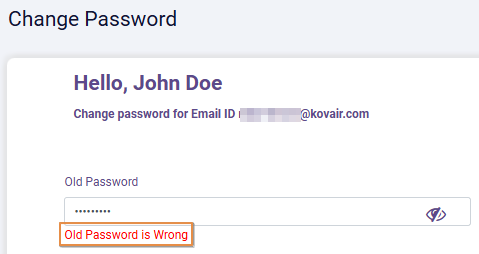 Fig: 81 - SurgeONE.ai login page
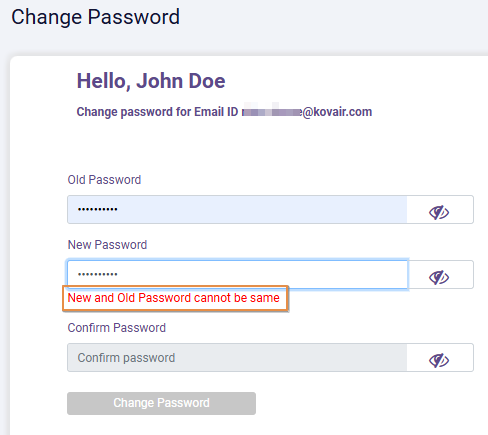 Fig: 82 - SurgeONE.ai login page
 Fig: 83 - SurgeONE.ai login page
4.2. Navigating to SurgeONE.ai Master Portal Settings > MFA Setup
Let us assume that you have logged-in to SurgeONE.ai master portal as a Partner Contact. Click on the Settings menu option of the left-panel menu and then on the expanded menu option labeled as MFA Setup to navigate to the MFA Setup page. Here is the default view of the MFA Setup screen.
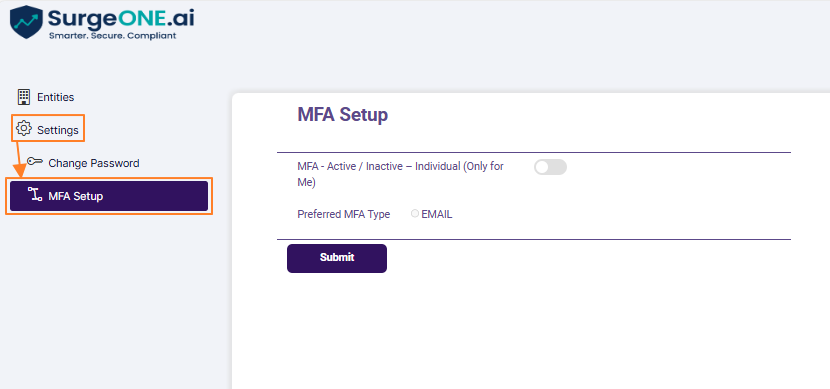 Fig: 84 - MFA Setup menu option
NOTE:
- MFA will be disabled for all users by default.
- In the MFA module, one gets the options to perform the following:
- Enable MFA on account login into SurgeONE.ai master portal
- Disable MFA on account login into SurgeONE.ai master portal
- By default, when you are visiting this screen for the first time, the sliders and radio buttons are usually disabled.
4.2.1. Toggling the MFA functionality of own Partner Contact Account
- The MFA Setup page displays the MFA Active/Inactive slider to toggle the MFA for own user account. Click on the slider to enable it. After the MFA Active/Inactive slider is enabled, then an EMAIL radio button gets displayed as selected against the Preferred MFA Type.
- Click on the Submit button. A success toast notification gets triggered and can be seen at the top.
 Fig: 85 - Own account MFA Active/Inactive slider view
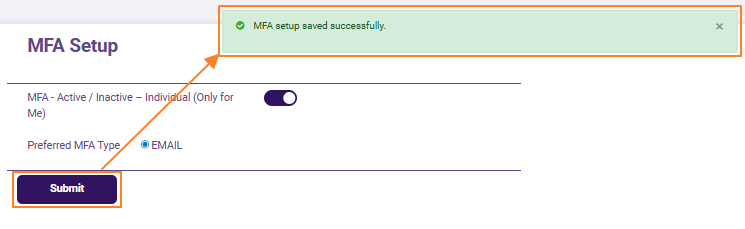 Fig: 86 - Success notification on MFA setup for own user account
4.2.2. Logging into SurgeONE.ai with MFA
- Next time the Partner Contact (whose MFA is enabled) tries to login to SurgeONE.ai with valid login credentials, he / she will be redirected to the MFA verification page and prompt to provide an authentication passcode (unique 6 digit code). Here is the view of the login page. The user needs to enter the username and password in the respective fields and click on the Login button.
- As the MFA is enabled, an email gets triggered. By default, you get redirected to the MFA verification page.
- Enter the unique code in the Verification Code field of the MFA verification page. The Submit button gets activated after you enter the unique code. Click on it to login to SurgeONE.ai.
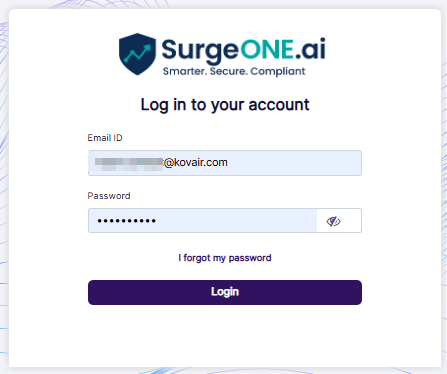 Fig: 87 - Entering own credentials in the login page to proceed to the MFA code input page when MFA is enabled
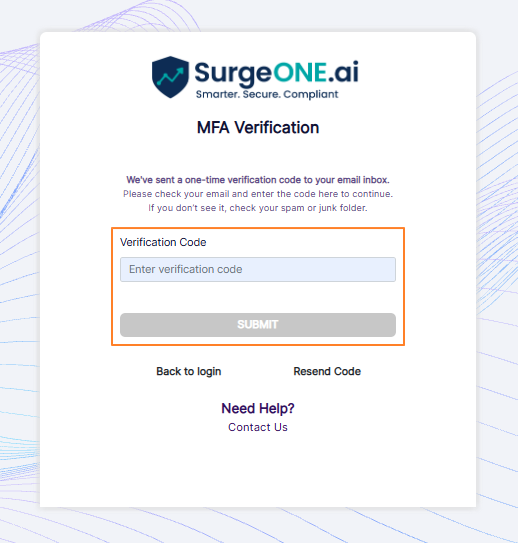 Fig: 88 - MFA verification page view
Here is the view of one such email:
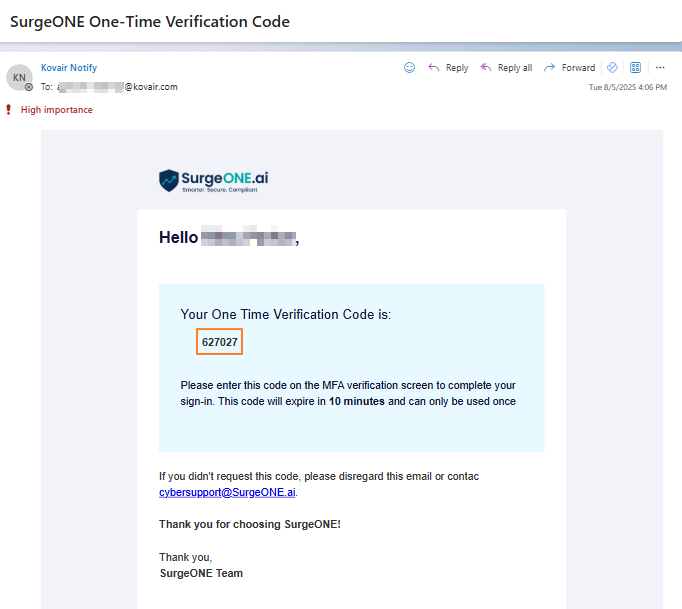 Fig: 89 - Email triggered with unique code for login authentication
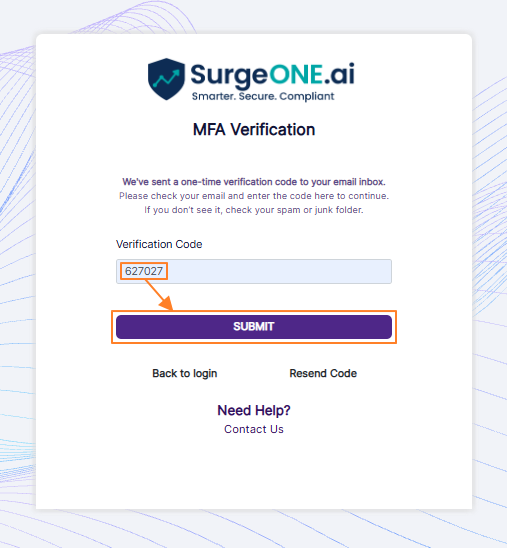 Fig: 90 - Submitting the received MFA code to login
NOTE:
- For existing SurgeONE.ai users (who already have an account), if MFA is activated, they will be prompted for a 2-step authentication during login starting from the very next time they login to SurgeONE.ai.
- The following error toast notification gets prompted at the top-right of the SurgeONE.ai MFA Verification screen during login, if the entered code token is expired. You need to click on the Back to login button to navigate back to the login screen, enter valid username and password, click on the Login button and again enter the received code (to your email address) in the Verification Code field.
- You must enter a valid code in the Verification Code field of the MFA verification page before clicking on the SUBMIT button. Otherwise, the system will prompt the following validation text below the field.
 Fig: 91 - Error toast notification prompted when the MFA login token is expired
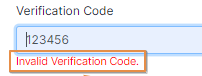 Fig: 92 - Validation employed on the Verification Code field
5. Using the Top Right Panel
You can find there are multiple icons provided in the top right panel (to the right of the organization name).
Page Context Help
The first one is the question mark  icon. Click on it to load the page context help.
Notifications Panel
Next to the question mark icon is the notifications  icon.
icon.
User Profile Picture
The third option is the Partner Contact profile picture preview and the logged-in username.
- To set your own profile picture, click on the Partner Contact profile picture preview to load the Upload Profile Picture modal window.
- Click on the Choose File button to browse and upload custom profile picture.
- Click on the Upload button to set it as the profile picture.
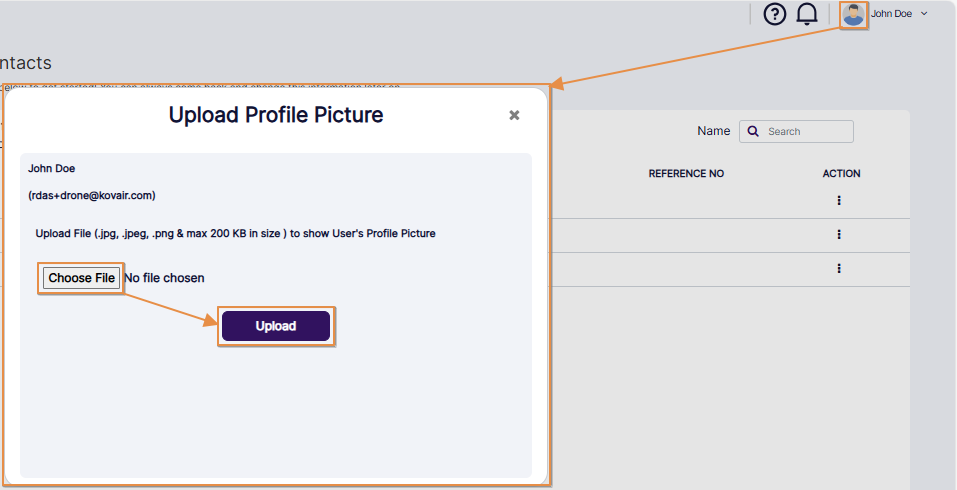 Fig: 93 - User profile picture upload modal window
User Profile Menu
Click on the down arrow  icon beside the name to load the user account context menu.
1. About SurgeONE
Click on the About SurgeONE menu option.
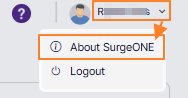 Fig: 94 - User menu expanded view showing the About SurgeONE menu option
The application debug and release versions can be seen. Click on cross  icon to close this view.
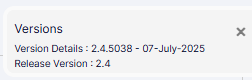 Fig: 95 - SurgeONE.ai application debug and release versions displayed after clicking on the About SurgeONE menu option
2. Logout
Click on the Logout option to terminate your logged in session and get redirected to the application login page. You need to login to re-access the application.
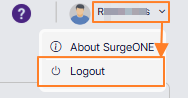 Fig: 96 - User menu expanded view showing the Logout button