
 This online help page is dedicated to the SurgeONE.ai Mail Templates screen and its associated functionalities. The Mail Templates page empowers users to manage and personalize reusable email formats that streamline communication across their organization. It provides users with the flexibility to customize subject lines, message content, and formatting, ensuring consistency and branding while saving time.
The accessibility and functionalities of the different sections of this page are dependant on the role based access controls / permissions set for the logged-in user. For more details refer to the Roles online help.
1. Viewing Mail Templates
Users gain a quick overview of available system-defined templates, allowing them to identify relevant messaging formats tailored to specific workflows. This visibility reduces redundancy and ensures alignment with organizational standards. SurgeONE mail templates ensure every message follows a predefined structure and tone. That means users don't have to reinvent the wheel with every email, leading to consistent branding, language, and formatting across teams or departments.
Click on the Settings menu option of the left panel menu and then again on the expanded sub-menu option labeled as Mail Templates.
Here is the view of the Mail Template List page. The page displays row entries of the existing mail templates.
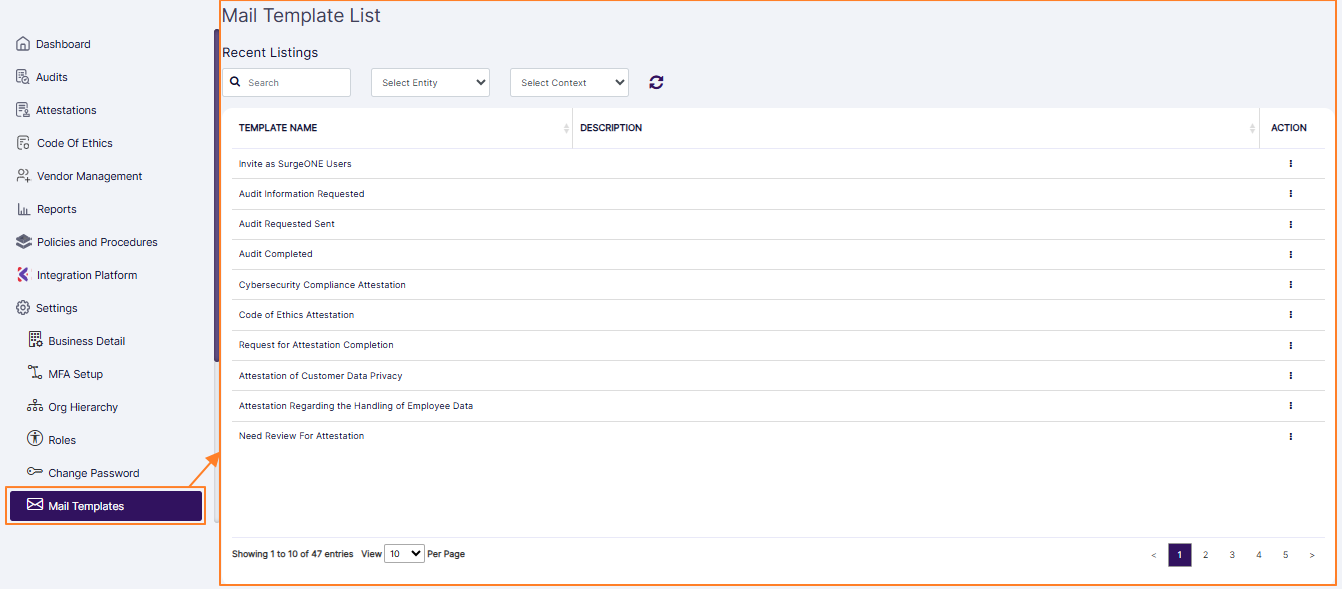 Fig: 1 - Mail Template List
The following filters are present in the report grid view:
- Search bar
- Select Entity dropdown
- Select Context dropdown
1. Search bar
Enter the text based on which you want to execute the search by. If matching entry is found, it will populate the report grid view.
 Fig: 2 - Search results
2. Dropdown filters
You can filter report results based on the entity from the Select Entity dropdown. Select any one option to load the matching results.
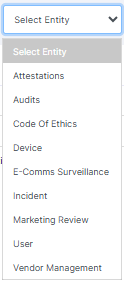 Fig: 3 - Select Entity filter option
You can filter report results based on the email context from the Select Context dropdown. Select any one option to load the matching results.
 Fig: 4 - Select Context filter option
The dropdown options of the Select Context dropdown can load depending on the entity selection made. Consider the following screenshot which displays the options of the Select Context dropdown when the Audits option of the Select Entity is already selected. If no entity is chosen, then the entire, default scrollabled list of context options load in the dropdown.
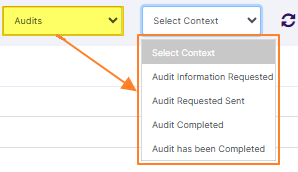 Fig: 5 - Select Context options load depending on entity selection done
3. Refresh icon
You can click on the refresh  icon to reset the report filters.
2. Understanding the grid view
The grid view provides a structured and easily navigable layout, making it simple to scan templates. Users can effortlessly locate templates by name, type, or category, promoting efficient decision-making and template selection.
The grid view display consists of the following columns: TEMPLATE NAME, DESCRIPTION and ACTION.
The ACTION column contains a kebab icon. Click on it to reveal the row context menu options.
 Fig: 6 - Row context menu options
Instead of composing emails from scratch, users can quickly select a template and make minor edits. This dramatically reduces the time spent drafting repetitive messages, like onboarding emails, appointment confirmations, or status updates. The ability to edit template content offers flexibility for personalization while maintaining core structure. Users can fine-tune triggered email communications, update terminology, and reflect current business needs.
To edit details about any listed email template, click on the expanded row context menu option labeled as Edit.
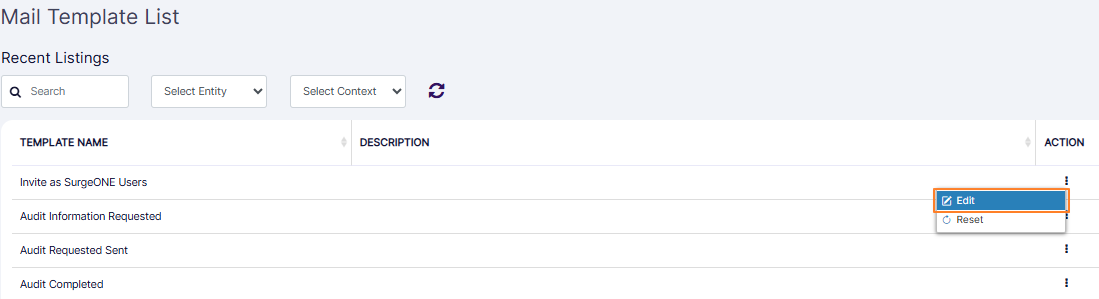 Fig: 7 - Row context menu option Edit
The following modal window loads to display the relevant details.
 Fig: 8 - Editing view
The following dataset are presented (if available):
- Context - Is an inactive field.
- Send Reminder - The slider can be toggled to send reminder.
- Frequency (Hrs) - Is an inactive field. The frequency is active when the Send Reminder slider is toggled to its enabled state.
- Description - Contains the field to add the description of the email template.
- Subject - Contains the email subject line field which is editable.
- Body - Contains the email body content area which is editable.
 NOTE:
NOTE:
- The Send Reminder and Frequency (Hrs) fields are present in only those mail templates which are related to the user invitation emails. Consider the following image which does not display these two fields.
- Validation is employed on the Frequency (Hrs) field, such that any non-numeric entry is not permitted and will prompt appropriate validation message below the field.
- When the Send Reminder slider is toggled to its disabled state, the Frequency (Hrs) field gets disabled and any value present within it gets removed.
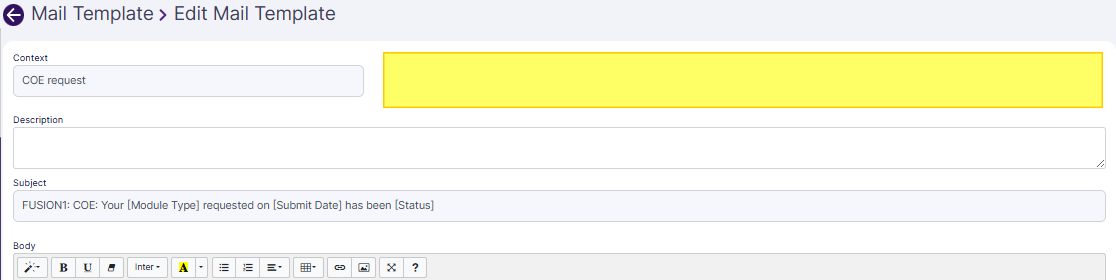 Fig: 9 - Send Reminder and Frequency (Hrs) fields not getting displayed
 Fig: 10 - Validation on numeric entry
You can click on the Reset to System button to revert any changes made.
You can click on the Submit button to save any changes made.
The following success notification gets displayed after you click on the Submit button.
 Fig: 11 - Success notification
Resetting a template restores default values, giving users a safe fallback when edits don't meet expectations. It fosters experimentation without risk, enabling confident customization and iteration.
To reset details about any listed email template, click on the expanded row context menu option labeled as Reset.
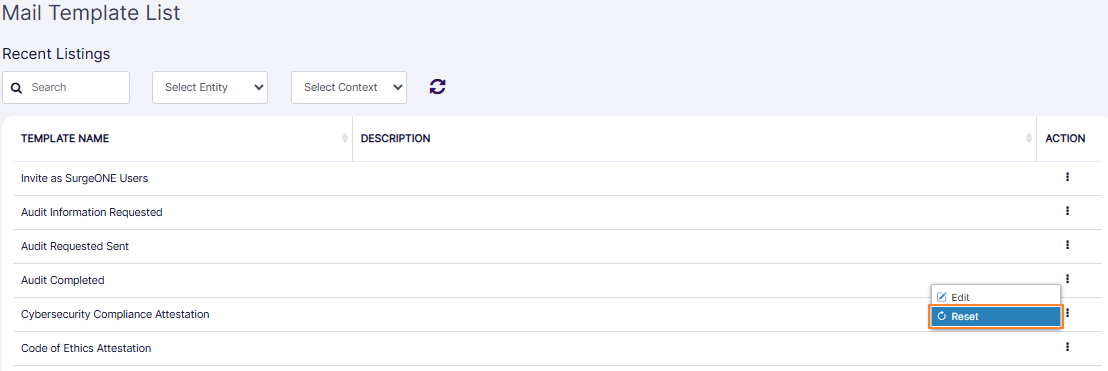 Fig: 12 - Row context menu option Reset
The following success notification gets displayed.
 Fig: 13 - Success notification
Pagination ensures faster load times and smoother navigation through large template libraries. Users can browse efficiently without being overwhelmed, improving accessibility and streamlining selection processes.
Pagination options are provided at the bottom for ease of access to the template list view entries.
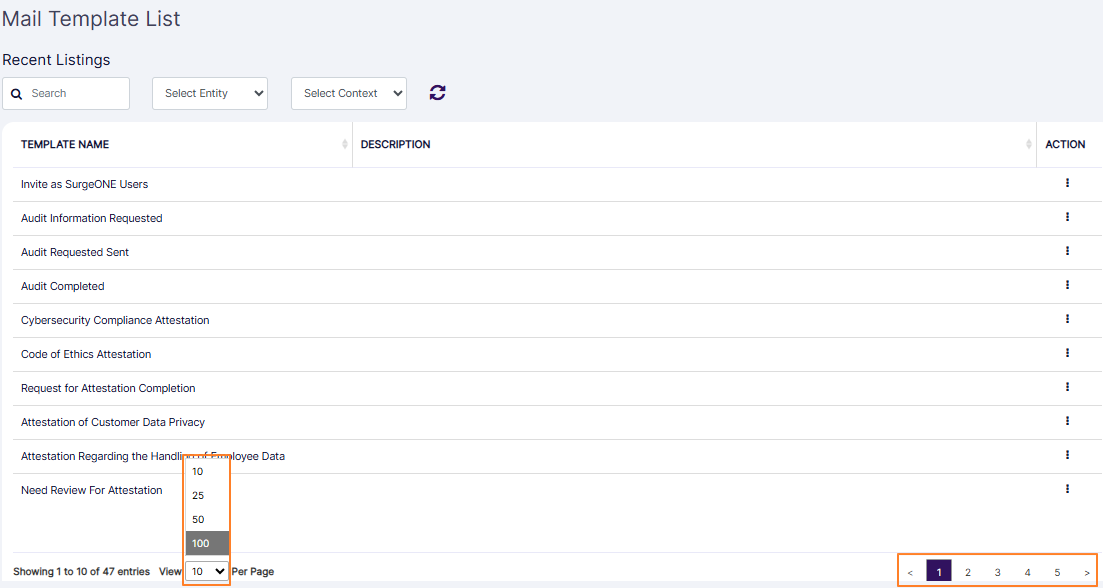 Fig: 14 - Pagination options