
 This online help page is dedicated to the SurgeONE.ai Customize Menu screen and its associated functionalities. Understand how to modify the menu labels, toggle menu items visibility and set a different landing page on application login.
The accessibility and functionalities of the different sections of this page are dependant on the role based access controls / permissions set for the logged-in user. For more details refer to the Roles online help.
1. Navigating to the Customize Menu page
Click on the Settings menu option and then on the Customize Menu sub-menu option under it to get redirected to the SurgeONE.ai Customize Menu page.
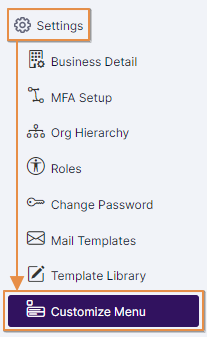 Fig: 1 - Menu option
Here is the view of the loaded page.
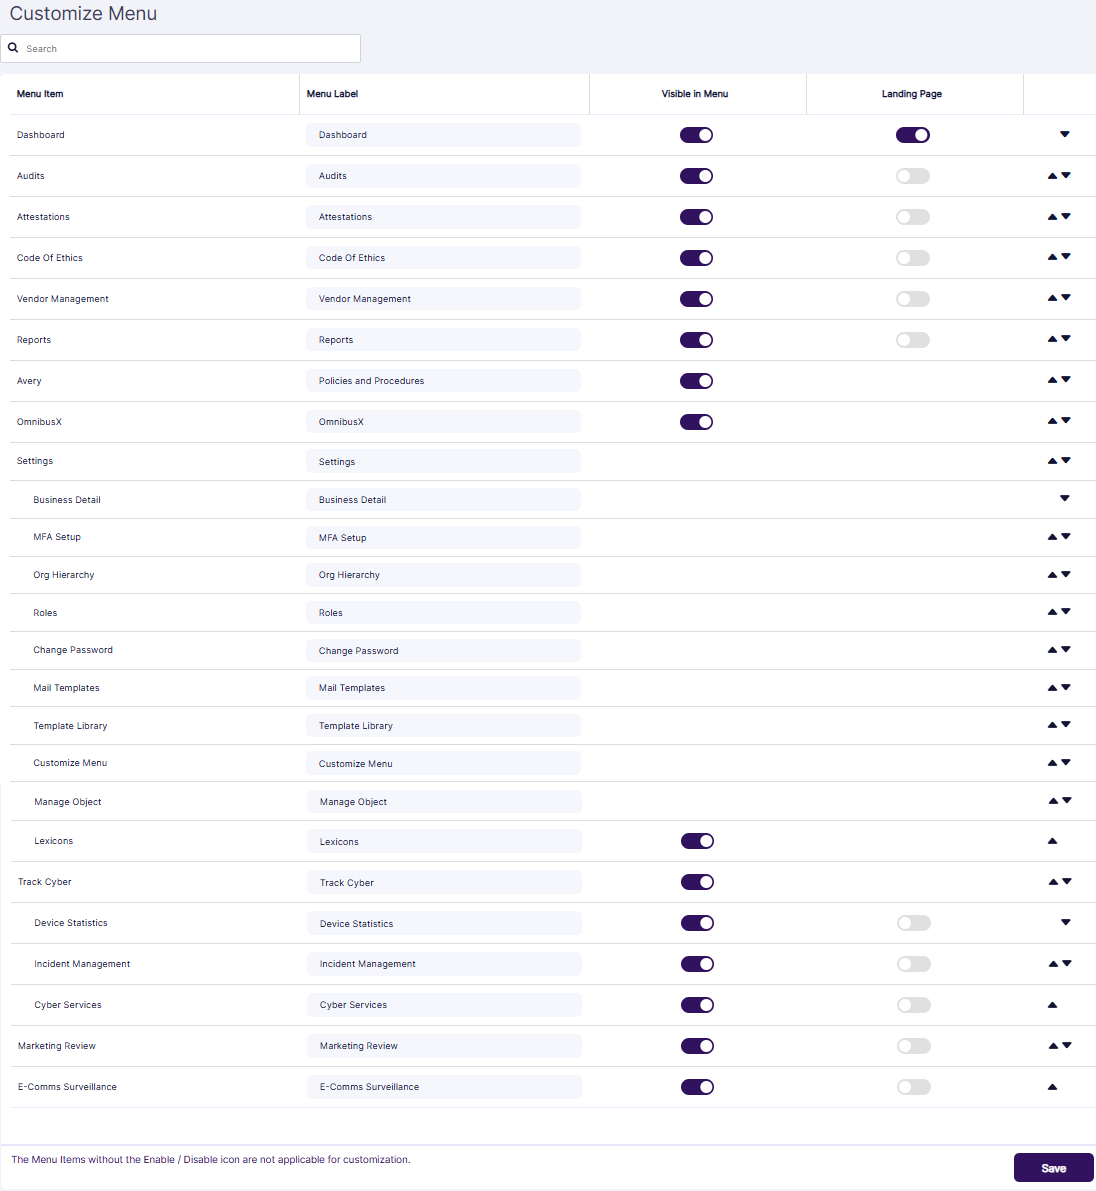
Fig: 2 - Customize Menu page view
2. Understanding various elements of the Customize Menu page
Refer to the following screenshot which is marked with numerical values that correspond to the below stated points. The following sub-sections elaborate of the functionalities.
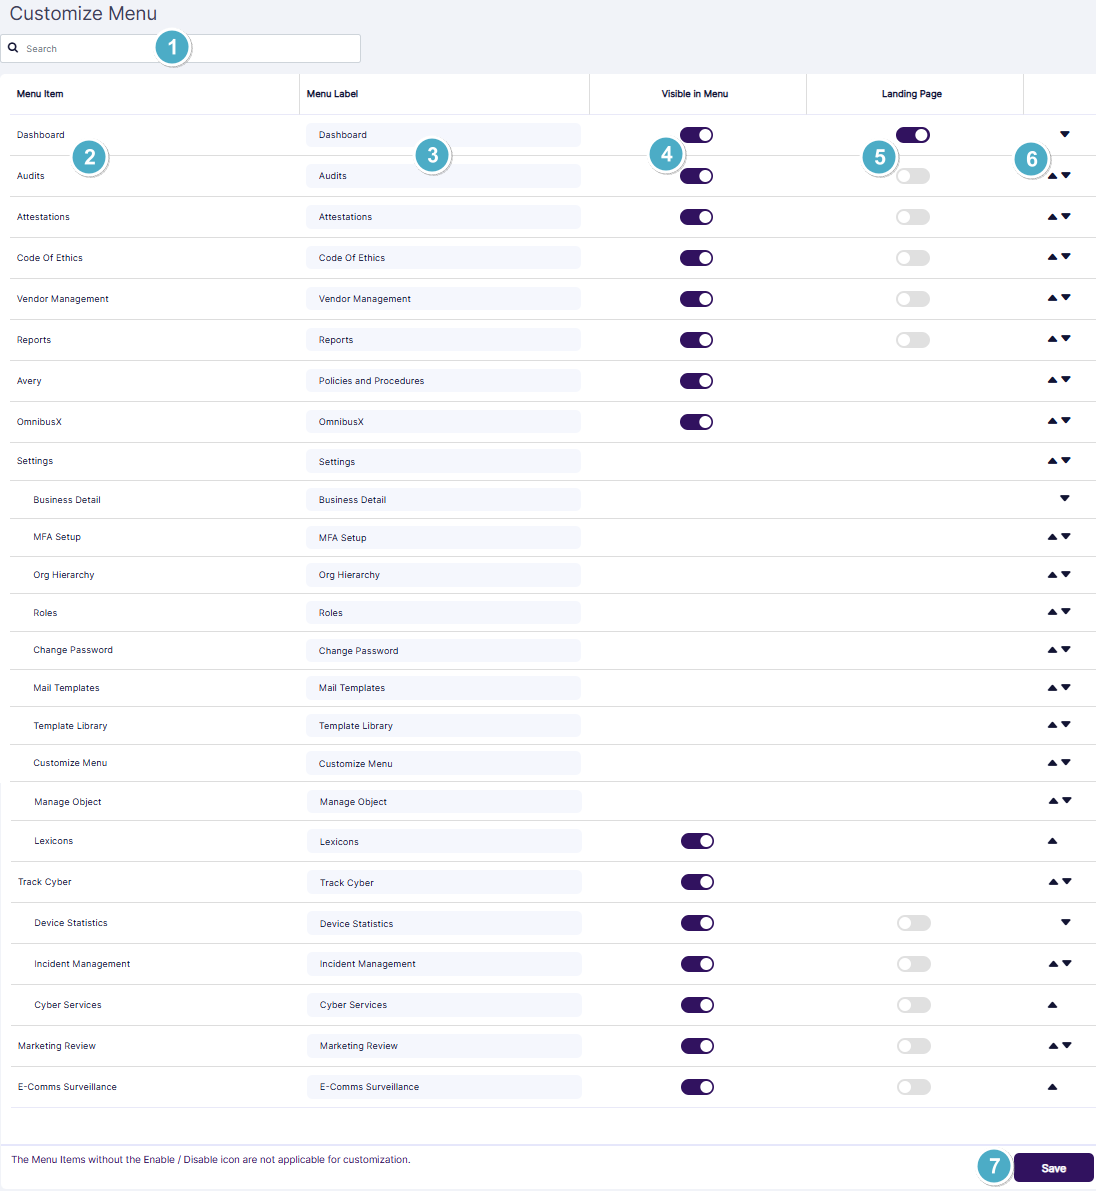
Fig: 3 - Understanding the Customize Menu page
- Search bar: Use it to filter out the menu items of SurgeONE.ai
- Menu Item: Displays the default names of the SurgeONE.ai menu items / respective pages, which are read-only values
- Menu Label: Displays the default set label of the SurgeONE.ai menu items, which can be modified
- Visible in Menu: Contains the enabled slider by default, which can be disabled to hide the menu item in the left panel
- Landing Page: Only the Dashboard menu item contains the enabled slider by default, while the rest ones are disabled
- Order setting arrow icons: Contains the up
 and down
  arrow icons which can be used to modify the default menu items ordering in the left panel
- Save: Use it to store any changes made to the menu configuration
2.1. Using the search bar of the Customize Menu page
Enter the text based on which you want to execute the search by. If matching entry is found, it will populate the grid view.
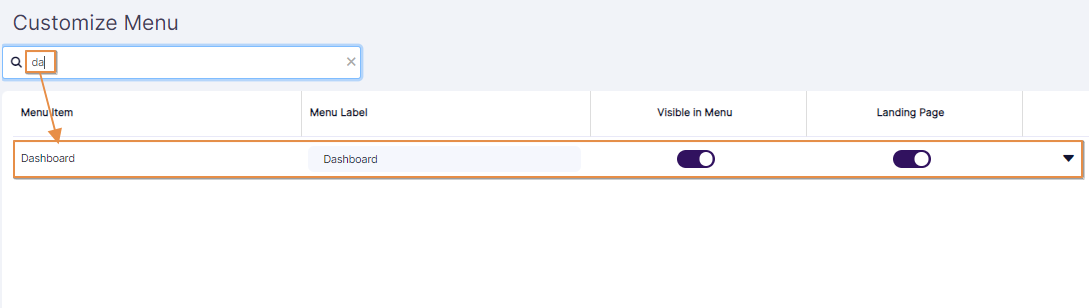 Fig: 4 - Using the search bar to find matching menu options
If no matching entry is found, a No matching records found label can be seen displayed in the grid view.
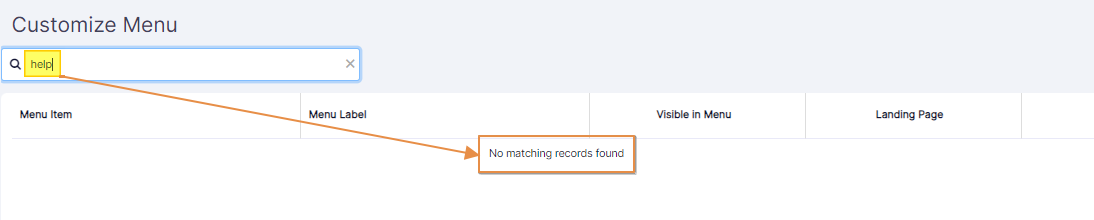 Fig: 5 - No search results found
 NOTE: Search operation is executed on the basis of the text input matched with the Menu Item and not on the Menu Label text values.
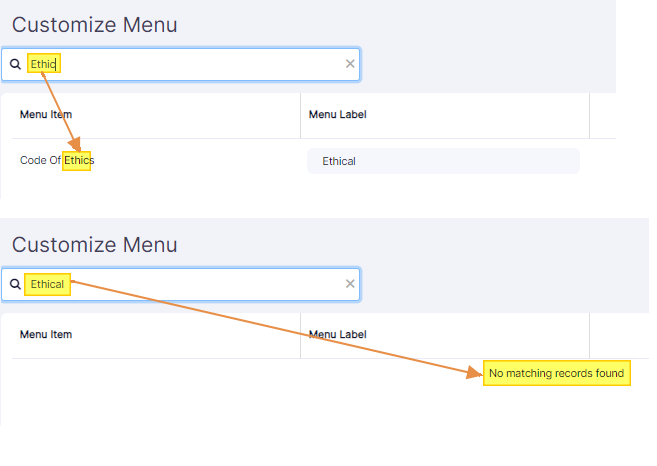 Fig: 6 - Search operation overview where text matching occurs on the basis of Menu Item label
2.2. Modify the Menu label
- Click once on the menu item label displayed on the respective field under the Menu Label column and remove it.
- Enter your own custom label as preferred. Click on the Save button at the bottom-right to store the menu option label change.
- A success notification is prompted at the top to notify you that the label change is saved.
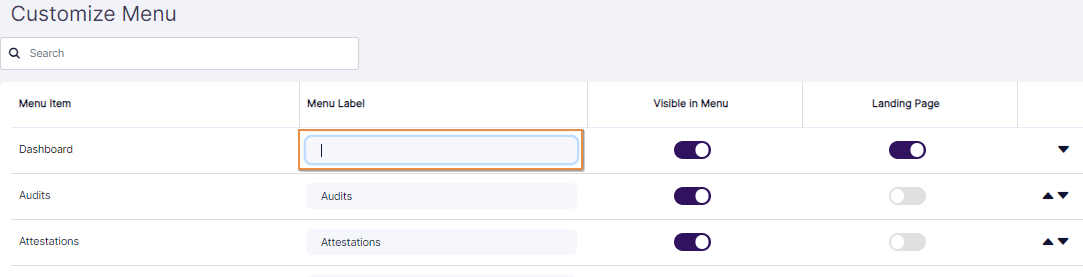 Fig: 7 - Editing menu item label
 Fig: 8 - Save button to record label change
 Fig: 9 - Success notification on label change
Notice that the respective menu item label is updated on the left panel.
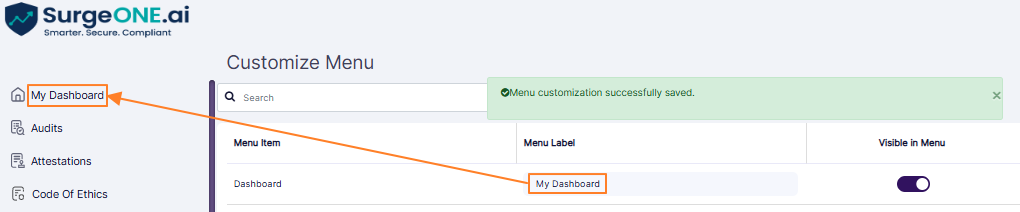 Fig: 10 - Menu item label change is visible on the left panel
NOTE: You can set a custom label for any menu or sub-menu item of the SurgeONE.ai application.
2.3. Toggle the Menu visibility
- Click once on the enabled slider
 icon displayed against the respective menu item under the Visible in Menu column. Let us consider that you are clicking on the enabled slider against the Audits menu option. It changes to a disabled
  state. Notice that the Audits menu option is visible on the left panel menu. Click on the Save button to record this change.
- After saving, a success notification is prompted at the top. Also, notice that the toggled menu item (Audits in the case) is visible in the Customize Menu page, however, since the slider under the Visible in Menu column is disabled , it is not displayed in the left panel menu.
 Fig: 11 - Enabled slider under the Visible in Menu column toggled to disabled state
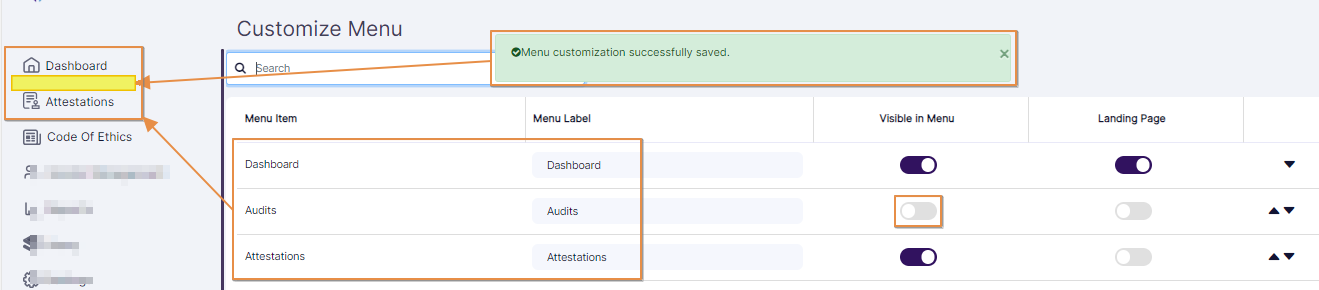 Fig: 12 - Success notification prompted and menu item hidden on left panel after disabling the Visible in Menu column slider and saving your change
You need to click again on the slider to enable it, and save the change to make the menu item visible again on the left panel menu.
NOTE: You can toggle the visibility of the following menu items:
- Dashboard
- Audits
- Attestations
- Code Of Ethics
- Vendor Management
- Reports
- Avery (or Policies and Procedures)
- OmnibusX
- Lexicons
- Cyber Compliance
- Device Statistics
- Incident Management
- Cyber Services
- Marketing Review
- E-Comms Surveillance
2.4. Toggle the SurgeONE.ai landing page
- By default, the Dashboard is set as the landing page. Click once on the enabled slider icon displayed against the respective menu item under the Landing Page column. Let us consider that you are clicking on the slider against the Audits menu option. The slider against the previously set default landing page gets automatically disabled when another slider under the Landing Page column is enabled . Click on the Save button to record this change.
- After saving, a success notification is prompted at the top. Now, when you login into the SurgeONE.ai application, this selected page will be set as the new application landing page for your user account.
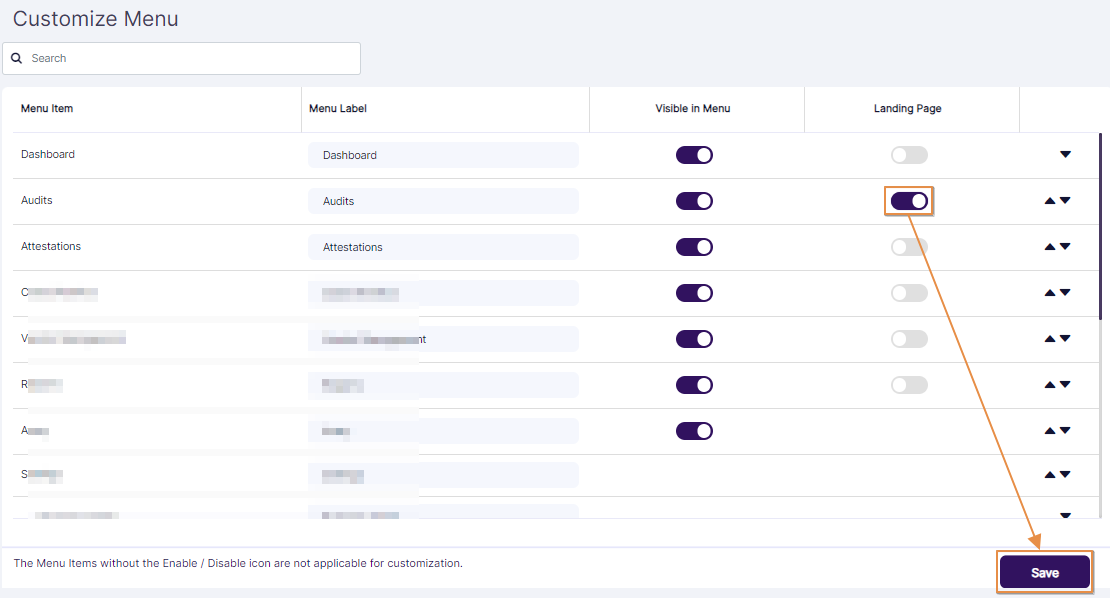 Fig: 13 - Enabled slider under the Landing Page column to set it as the landing page
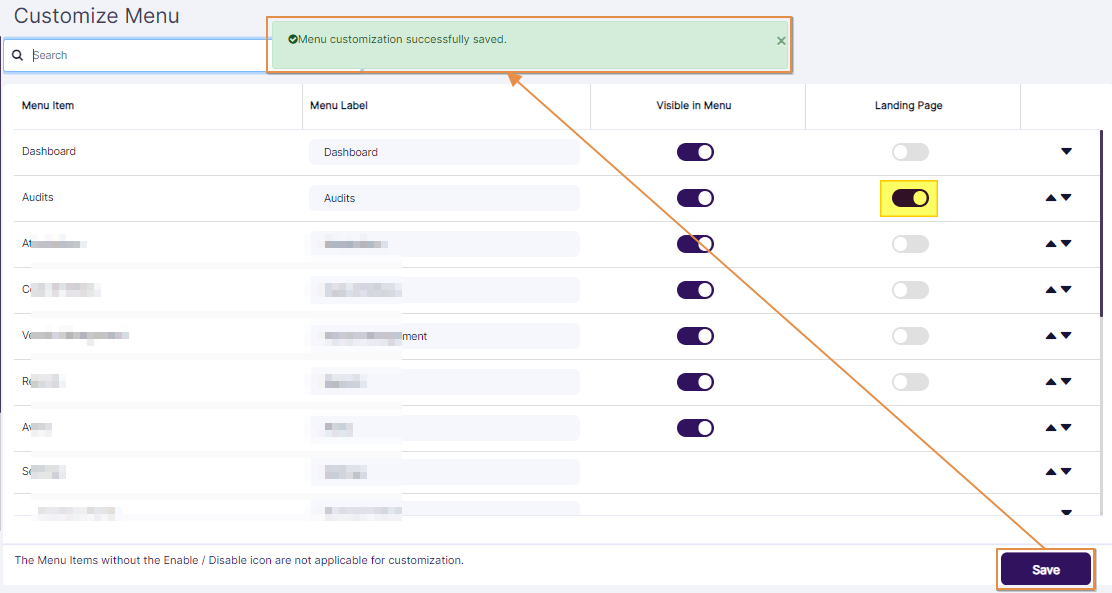 Fig: 14 - Success notification prompted and selected menu item page set as the application landing page
NOTE: You can set the following menu items as the default landing page of the SurgeONE.ai application:
- Dashboard
- Audits
- Attestations
- Code Of Ethics
- Vendor Management
- Reports
- Device Statistics
- Incident Management
- Cyber Services
- Marketing Review
- E-Comms Surveillance
2.5. Modify the Menu order
Notice that the arrow icons are present on the right side of the page. You can click once on the up icon or on the down icon displayed against the respective menu item to modify the menu items ordering.
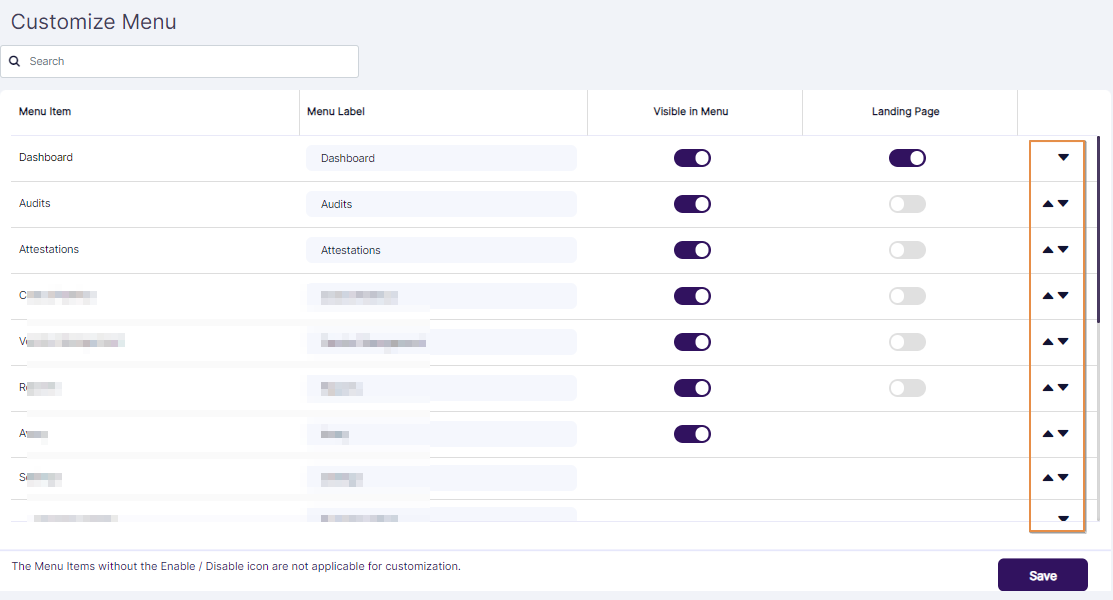 Fig: 15 - Enabled slider under the Landing Page column to set it as the landing page
- Let us consider that you are clicking on the up arrow against the Audits menu option. Notice that the order to the menu items gets updated on the page. Click on the Save button to record this change.
- After saving, a success notification is prompted at the top. Now, when you login into the SurgeONE.ai application, this selected page will be set as the new application landing page for your user account.
 Fig: 16 - Modified menu items order
 Fig: 17 - Success notification prompted and menu items order updated on the left panel menu
NOTE: You cannot toggle the order of the Cyber Services sub-menu item. This is because it is the only item under the Cyber Compliance menu option.